Tag Archives: DIY

“Cool” summer project

Note: If this is your first time to TotalFluff, please visit this brief explanation. Thanks!

Hiya, Fluffsters!

In keeping with the current temporary theme of cool things, here’s a video tutorial of something called “ice dying.” This is something that looks not only cool, but also nifty.

Isn’t that a fun result? I’d really like to try it at some point!

Anyway, have a great Wednesday!

DIY easy paper fan tutorial

Note: If this is your first time to TotalFluff, please visit this brief explanation. Thanks!

Hello, Fluffsters! It’s still really hot where I am. So I’m continuing tips on staying cool. Today I’m talking about how to do an…

Easy DIY paper fan.

It’s really easy. The bare necessities are some sort rectangular papery substance that holds a fold. The thicker the paper, the more air flow you can get, but almost any type of paper will work. (I would not use rice paper or origami paper, but I suppose you can.)

The optional first step is to color a picture on your paper. This is particularly fun for kids, and makes a great time-sink for them.

A blank page of paper illustrated

Your blank page. Hold it like this.

To start the fold, take one of the sides of your paper, and fold it in (on top of the rest of the paper) by about an inch or so.

Paper fan step 1: illustration of the first fold.

The first fold.

Next, take both parts of your fold, and fold that part back the same amount.


Second fold of making a fan.

Second Fold

After that, keep alternating. Fold in, then out, then in, then out…

You’ll eventually end up with something like these:

side view of folded paper

side view of folded paper

Final fold lines on the fan

Each line (except the end ones) are fold lines.

Then you’ll want to gather the bottom of your fan closer together, for easier hold.

View of the fan from the front.

Front view of the (almost) finished fan.

After that, just start using your fan as you would any other! Stiffer paper fans can provide lots of air flow and are very useful. I hope you can stay cool!

DIY Flower Hair Wreath

Note: If this is your first time to TotalFluff, please visit this brief explanation. Thanks!

Hello, Fluffsters!

In case you hadn’t picked up on this by now, I enjoy arts and crafts. Tonight I made a flower wreath for my hair. (Out of fake flowers, so I’ll be able to use it for an upcoming event.)

It’s not entirely finished yet, but it’s close! (I need to trim some ends, and decide whether or not to add glittery stuff. It’s going to be for a semi-earth-fairy-ish costume, so I’m potentially going to sparklify it. Regardless, I needed a flower circlet for the character, so I decided to try to DIY a flower wreath. 🙂 )

First, I went to Michaels and looked for some mini rosettes. The original plan had  been to braid some of those lovely wire-stemmed miniature rosettes into a wreath. That didn’t happen, due to lack of rosettes I was looking for. So I improvised.

I instead went with these flowers:

purple and white fake flowers to be turned into a DIY hair wreath

Purple & White fake flowers

Fortunately for me, they were on a good sale, so I got them for a decent price. I actually took that picture after removing a number of the flowers (with stems) for the wreath. But that’s getting ahead of myself…

So as I was saying. I got those flowers. And then I used some wire cutters to cut individual strands as long as I could. I removed leaves and extra bunches that were at extreme angles.

I then laid about three stalks together, and somewhat braided them. The stems were not that malleable, so I used some ribbon (and later some long synthetic leaves from the white bunch of flowers) to tie the stalks together. When I got towards the end of a bunch, I put the next set on. And kept tying.

As I was doing this, I measured the wreath around my head to make sure it would fit. (That had the added bonus of building the curve into the wreath.) As I tied and measured, I did bend the stems into the proper form. They can hold the more gradual curve; they’re just not good for braiding.

When it got long enough, I tied the beginning to the end.

Here’s what I have of the wreath so far:

DIY flower hair-circlet top view

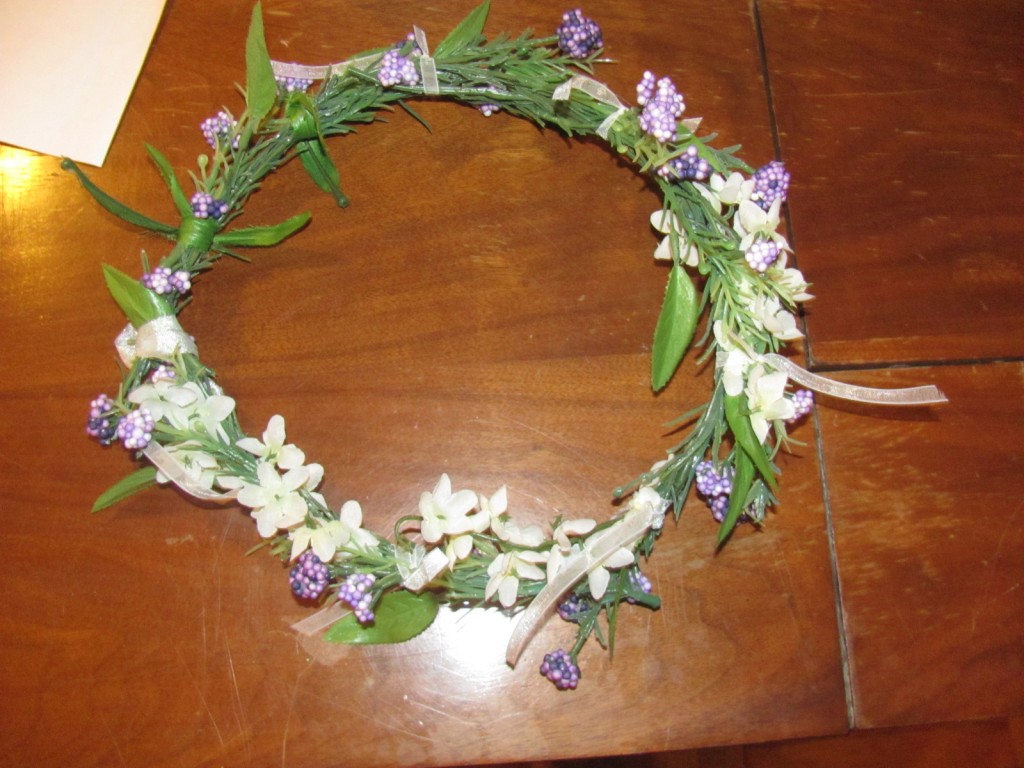
Top view of my hair flower wreath
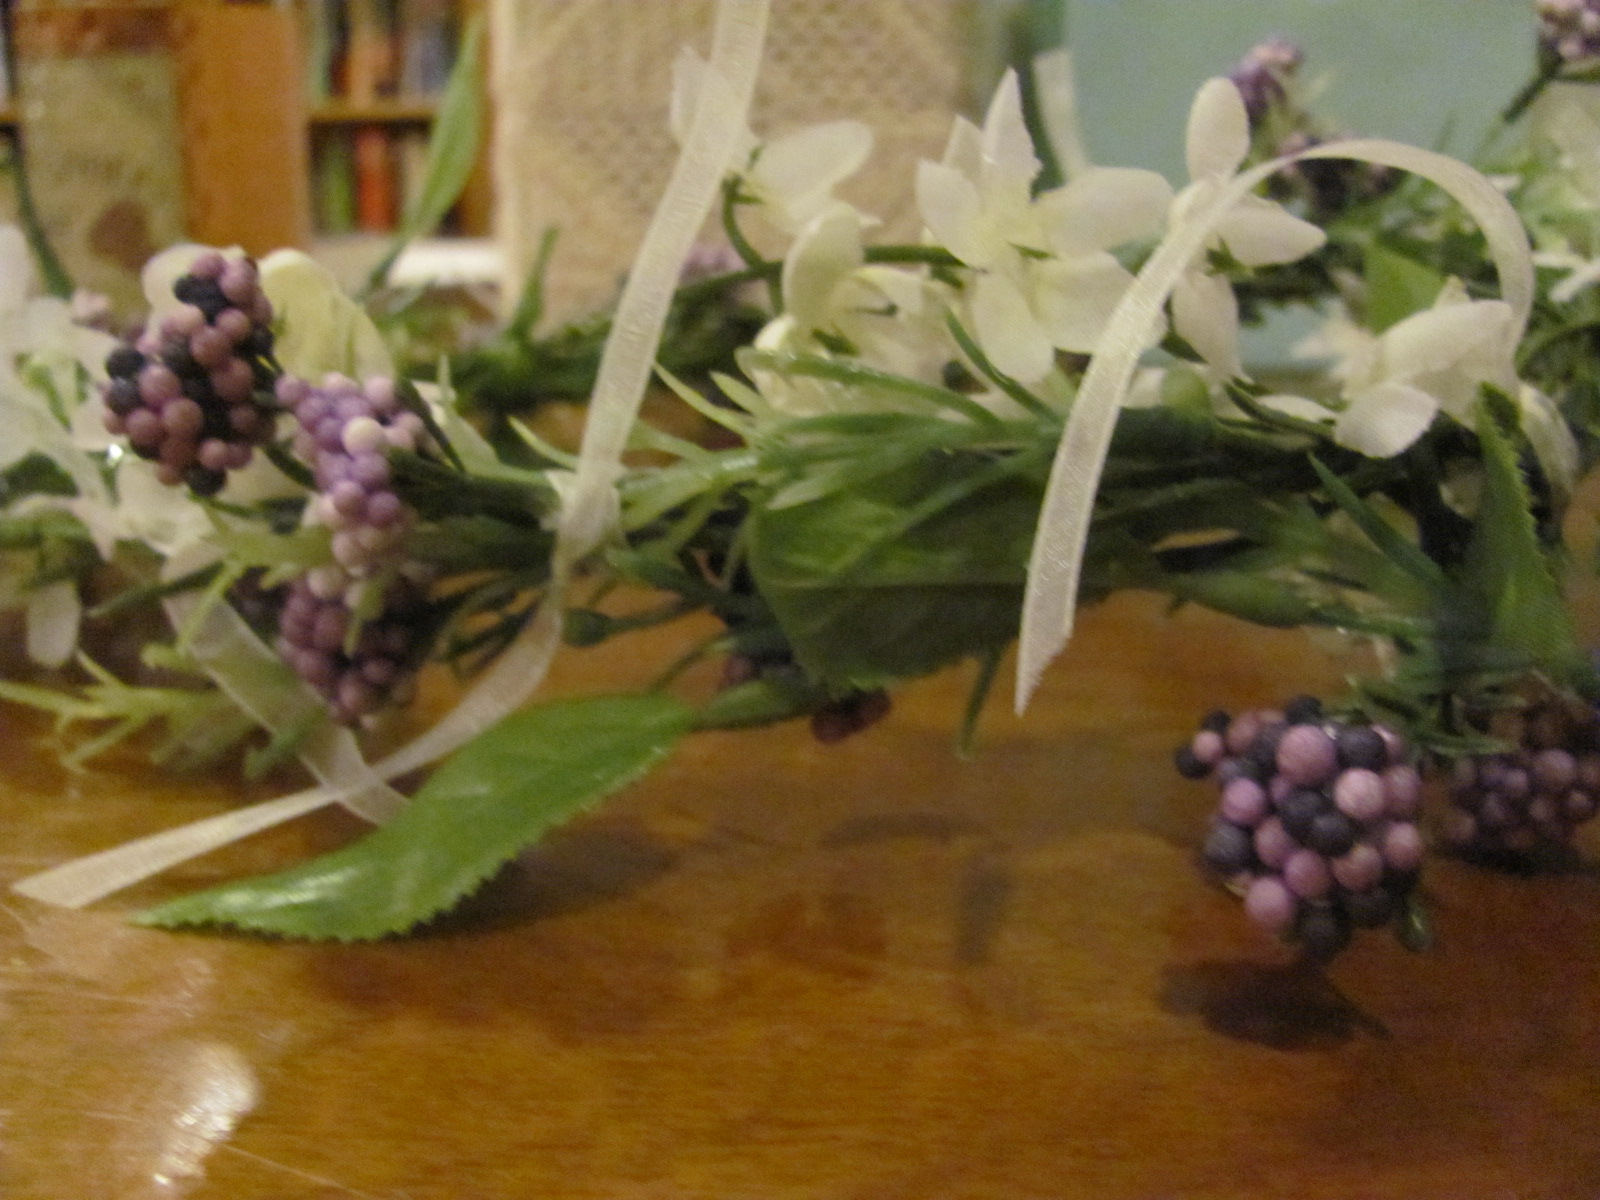
Front view:

front view of the DIY hair circlet of synthetic flower

Front view of my flower circlet

I’m fairly happy with how it turned out. 🙂

How about you, Fluffsters? Have you created anything interesting lately?