Tag Archives: crafts

FUN story(ish) luck(ish) knitting project!

Note: If this is your first time to TotalFluff, please visit this brief explanation. Thanks!

Hi!

So. Somebody on Facebook shared a link to a fun social crafting idea. It’s a “Knit Your Own Adventure” thing.

It looks like it combines RPG-ness with knitting. And I’m not really describing it well. But you should check out the article on it. It looks cool!

Anyway. Happy Tuesday!

I made another fake window!

Note: If this is your first time to TotalFluff, please visit this brief explanation. Thanks!

Hiya, Fluffsters!

So, I made another fake window yesterday in photoshop. This time using a slightly different process. (At the very least, I didn’t put a framed ‘picture’ in my ‘window’. It’s just the ‘window.’)

And I’m happy with how it turned out.

Have a lovely Friday!

pretty "window" view

“Cool” summer project

Note: If this is your first time to TotalFluff, please visit this brief explanation. Thanks!

Hiya, Fluffsters!

In keeping with the current temporary theme of cool things, here’s a video tutorial of something called “ice dying.” This is something that looks not only cool, but also nifty.

Isn’t that a fun result? I’d really like to try it at some point!

Anyway, have a great Wednesday!

Totally NOT a Disney knock-off. Nope, not here.

Note: If this is your first time to TotalFluff, please visit this brief explanation. Thanks!

Greetings, readers!

The way some companies get around licensing amuses me. For example, there is a McCall sewing pattern that is a “princess dress” pattern that is totally not a Disney pattern.

Have you visited the link yet? If not, I will wait for you to get back.

Yes. Not Disney. The words “Disney”, “Cinderella”, and “Belle” were mentioned nowhere on that page.

And besides which, the dress instructions clearly call for ribbons, not butterflies. Thus, the pattern is in no way related to Disney’s Cinderella reboot. Not from that company!

Yup.

Have a great day!

DIY Miniature Painted Banner Tutorial

Note: If this is your first time to TotalFluff, please visit this brief explanation. Thanks!

Hello, Fluffsters! Happy Wednesday!

As I mentioned yesterday, I’ve been a bit busy crafting. (It’s been fantastically fun.)

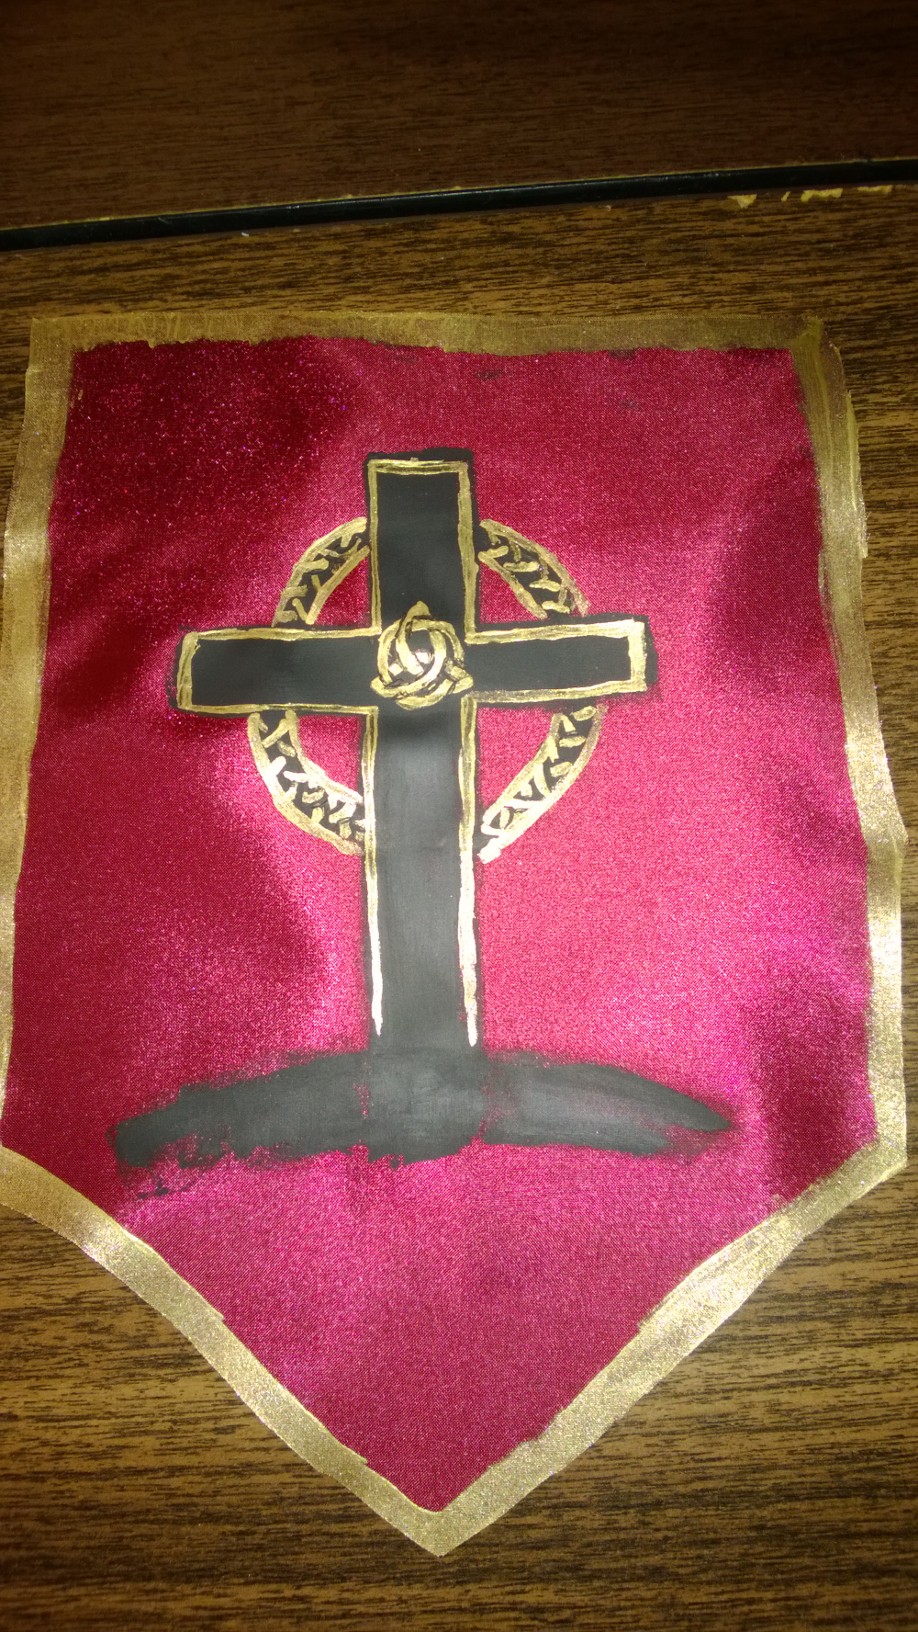
The first thing that I made yesterday was a painted miniature banner.

Gold painted sun on dark blue miniature banner.

I really liked the gold paint on the blue.

The really fun part about it? It’s glow in the dark! That means that the sun motif disappears in the dark, and the stars that I painted on come out. This is my first attempt at painting a banner, and I think it worked really well. (If I do say so myself!)

DIY Miniature Painted Banner Tutorial

Materials

To start with, find any spare piece of fabric. I personally used a dark blue satin that I had. (I made a dress out of the material about two years ago, and never got rid of the scraps. What can I say? They sometimes turn out to be useful!)

A length of blue satin fabric to make a banner

A small piece of fabric.

Also, get a needle and some sewing thread. I happened to find some that matched the fabric almost perfectly. I love it when that happens! At the end, you’ll also need some paint that works on Fabric. I used either Martha Stewart All Purpose Paint, or Folk Art Acrylic. (I don’t remember which- sorry!)

So, just to clarify, you’ll need

  • Fabric scrap (Any size works. It depends on how big you want your banner.)
  • Needle & Thread
  • Paints that work on fabric

Instructions

1) Cut a piece of fabric. I first trimmed it down to approximately a reasonable size. I think it was about 6×8 inches, but I’m not entirely sure. This is really flexible, though, and only depends on how large you want your banner to be. Whatever size you’re making it, don’t forget that you’re going to need to leave room for hemming. Unless you found a fabric that doesn’t fray, like I did with my red banner from yesterday. However, since this is for a sewn and painted banner, I’m going to assume the fabric frays.

That was a bit circuitous…

Oops. Sorry.

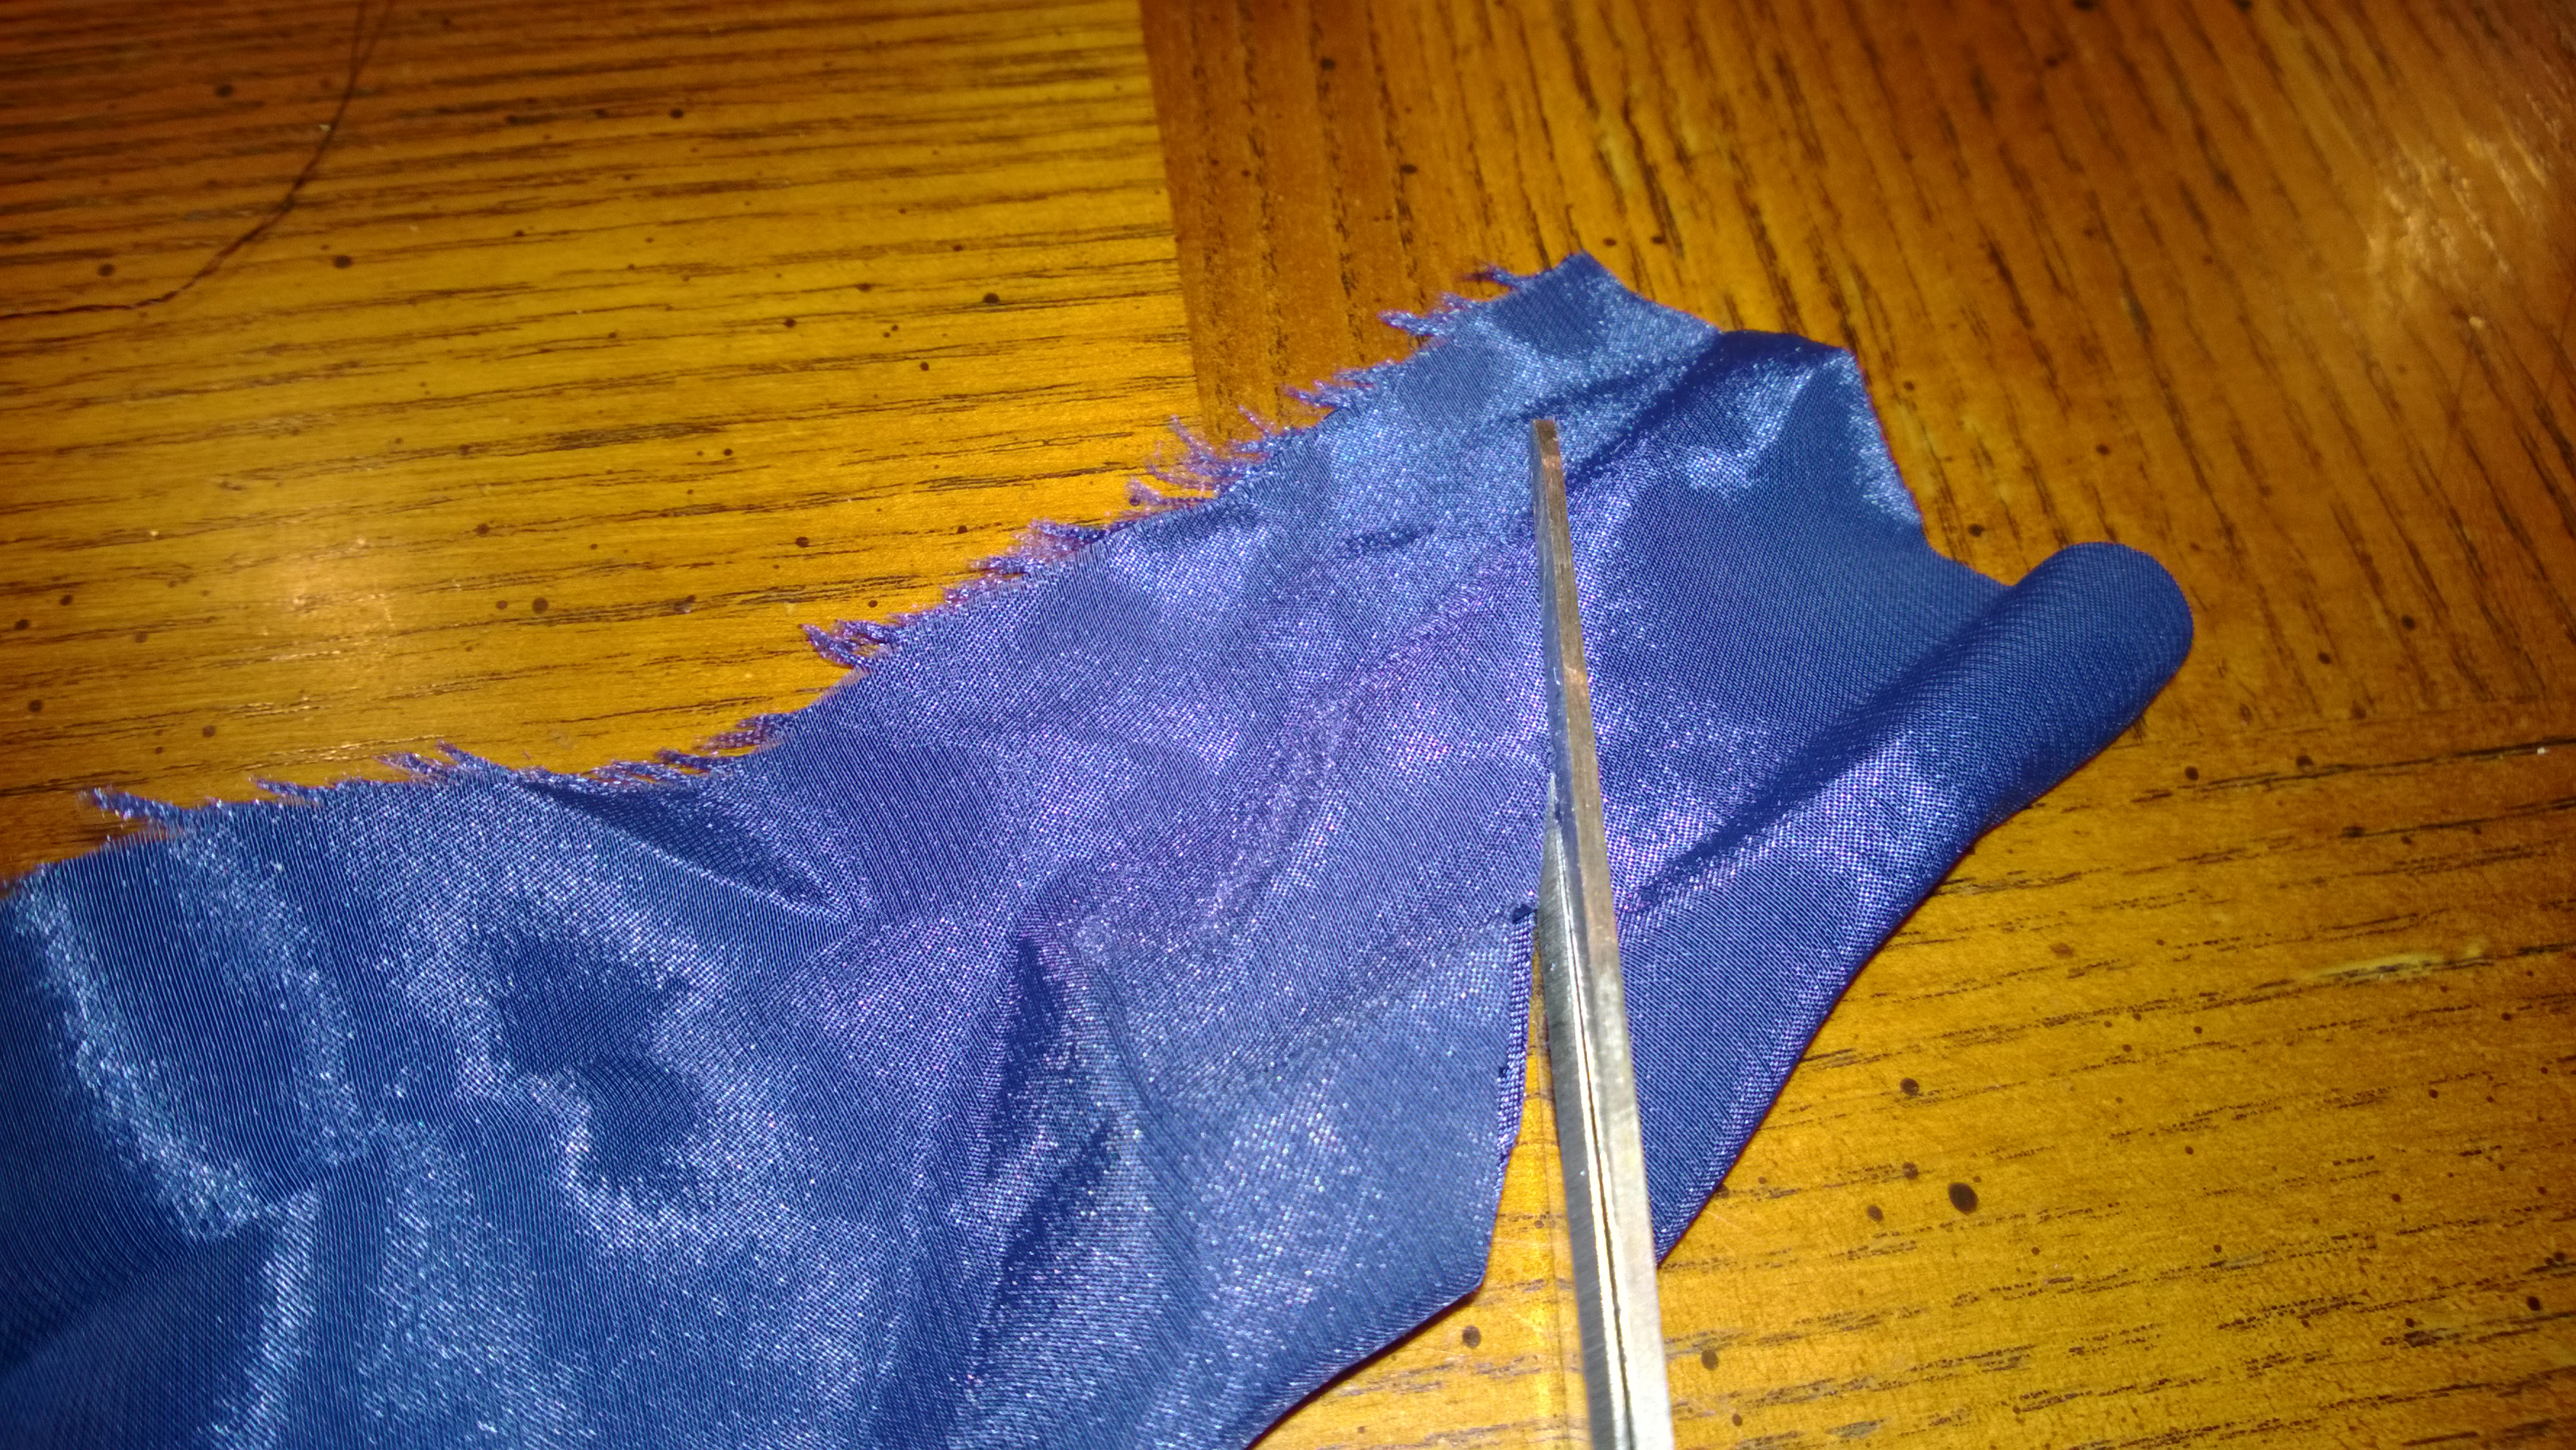
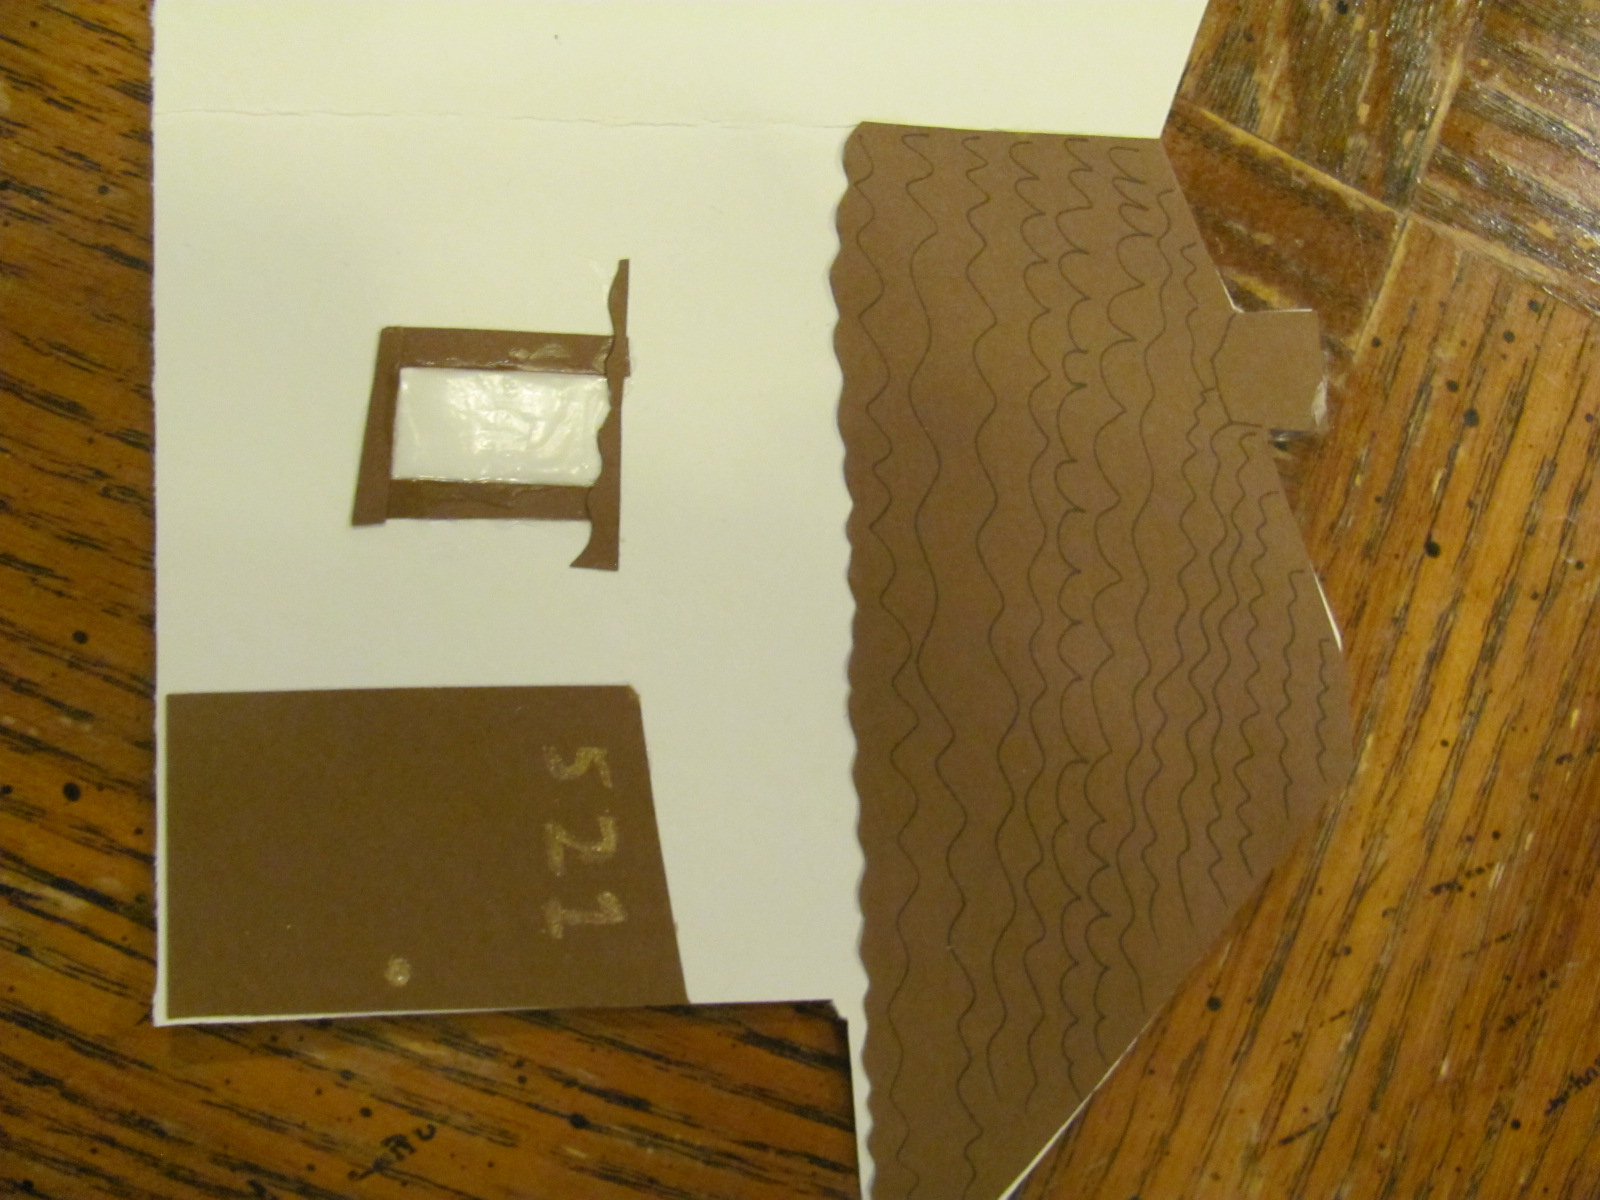
2) Shape the fabric. To get the banner shape, first fold the fabric in half length-wise / vertically. (Or “hotdog style” if that helps.) Next, from about 1/4 to 1/3 of the way up on the fold, cut towards the open edge corners. This gets the “splayed” banner effect. (If you want more of a shield shape, cut at an angle from the bottom of the fold up towards about 1/4 to 1/3 of the way up the fabric, at the edge side.)

cutting at an angle from the fold towards the bottom corners

Cutting the fabric into a banner shape.

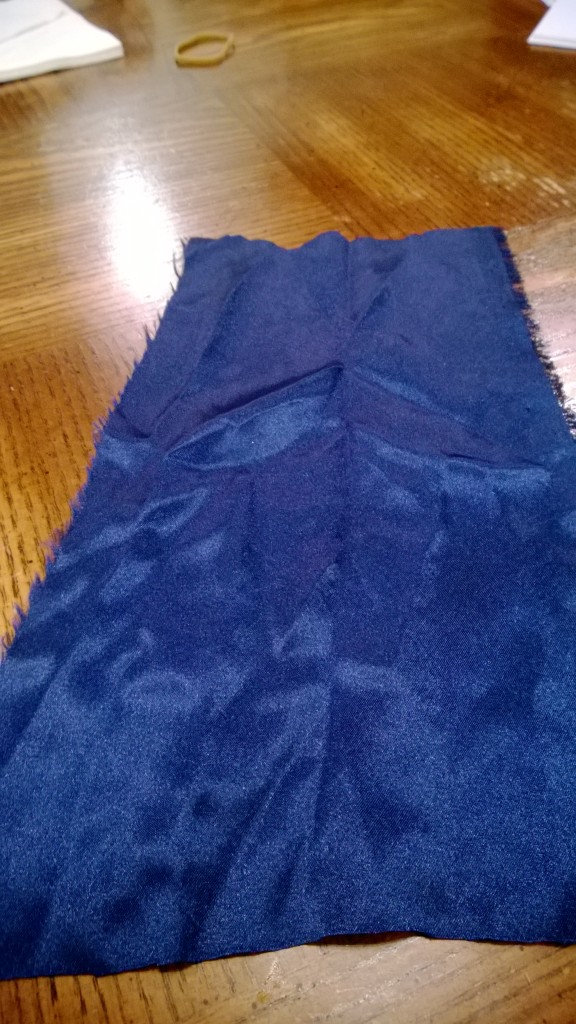
It should look something like this when you’re done and unfold it:

a basic banner shape after cutting the fabric

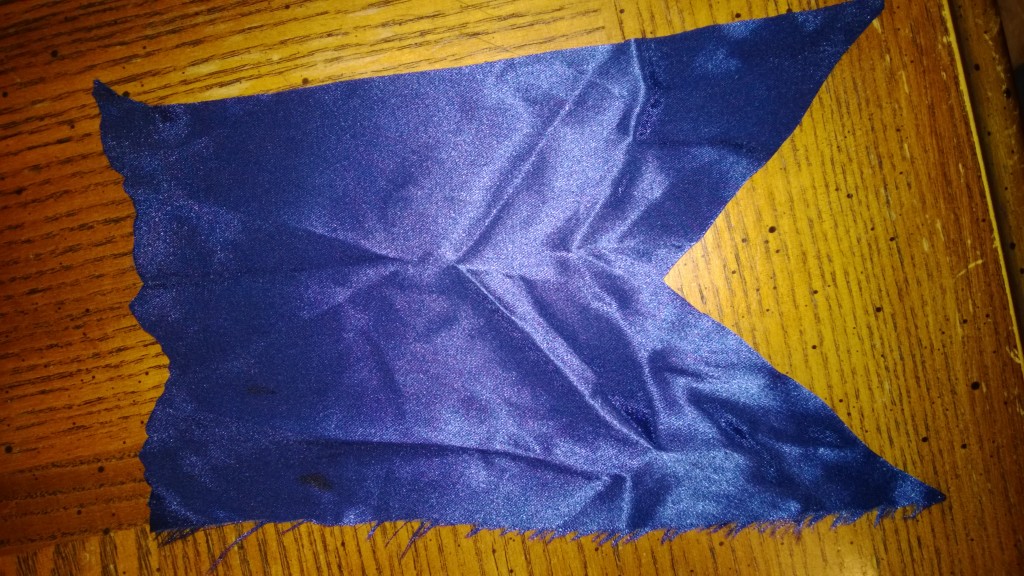
unfolded splayed banner shape

Note: I didn’t iron this fabric before cutting. That was a mistake. Take the time and get the wrinkles out! It helps a lot with painting later on.

I also don’t show it here, but after this, I evened out the top edge slightly, even before stitching.

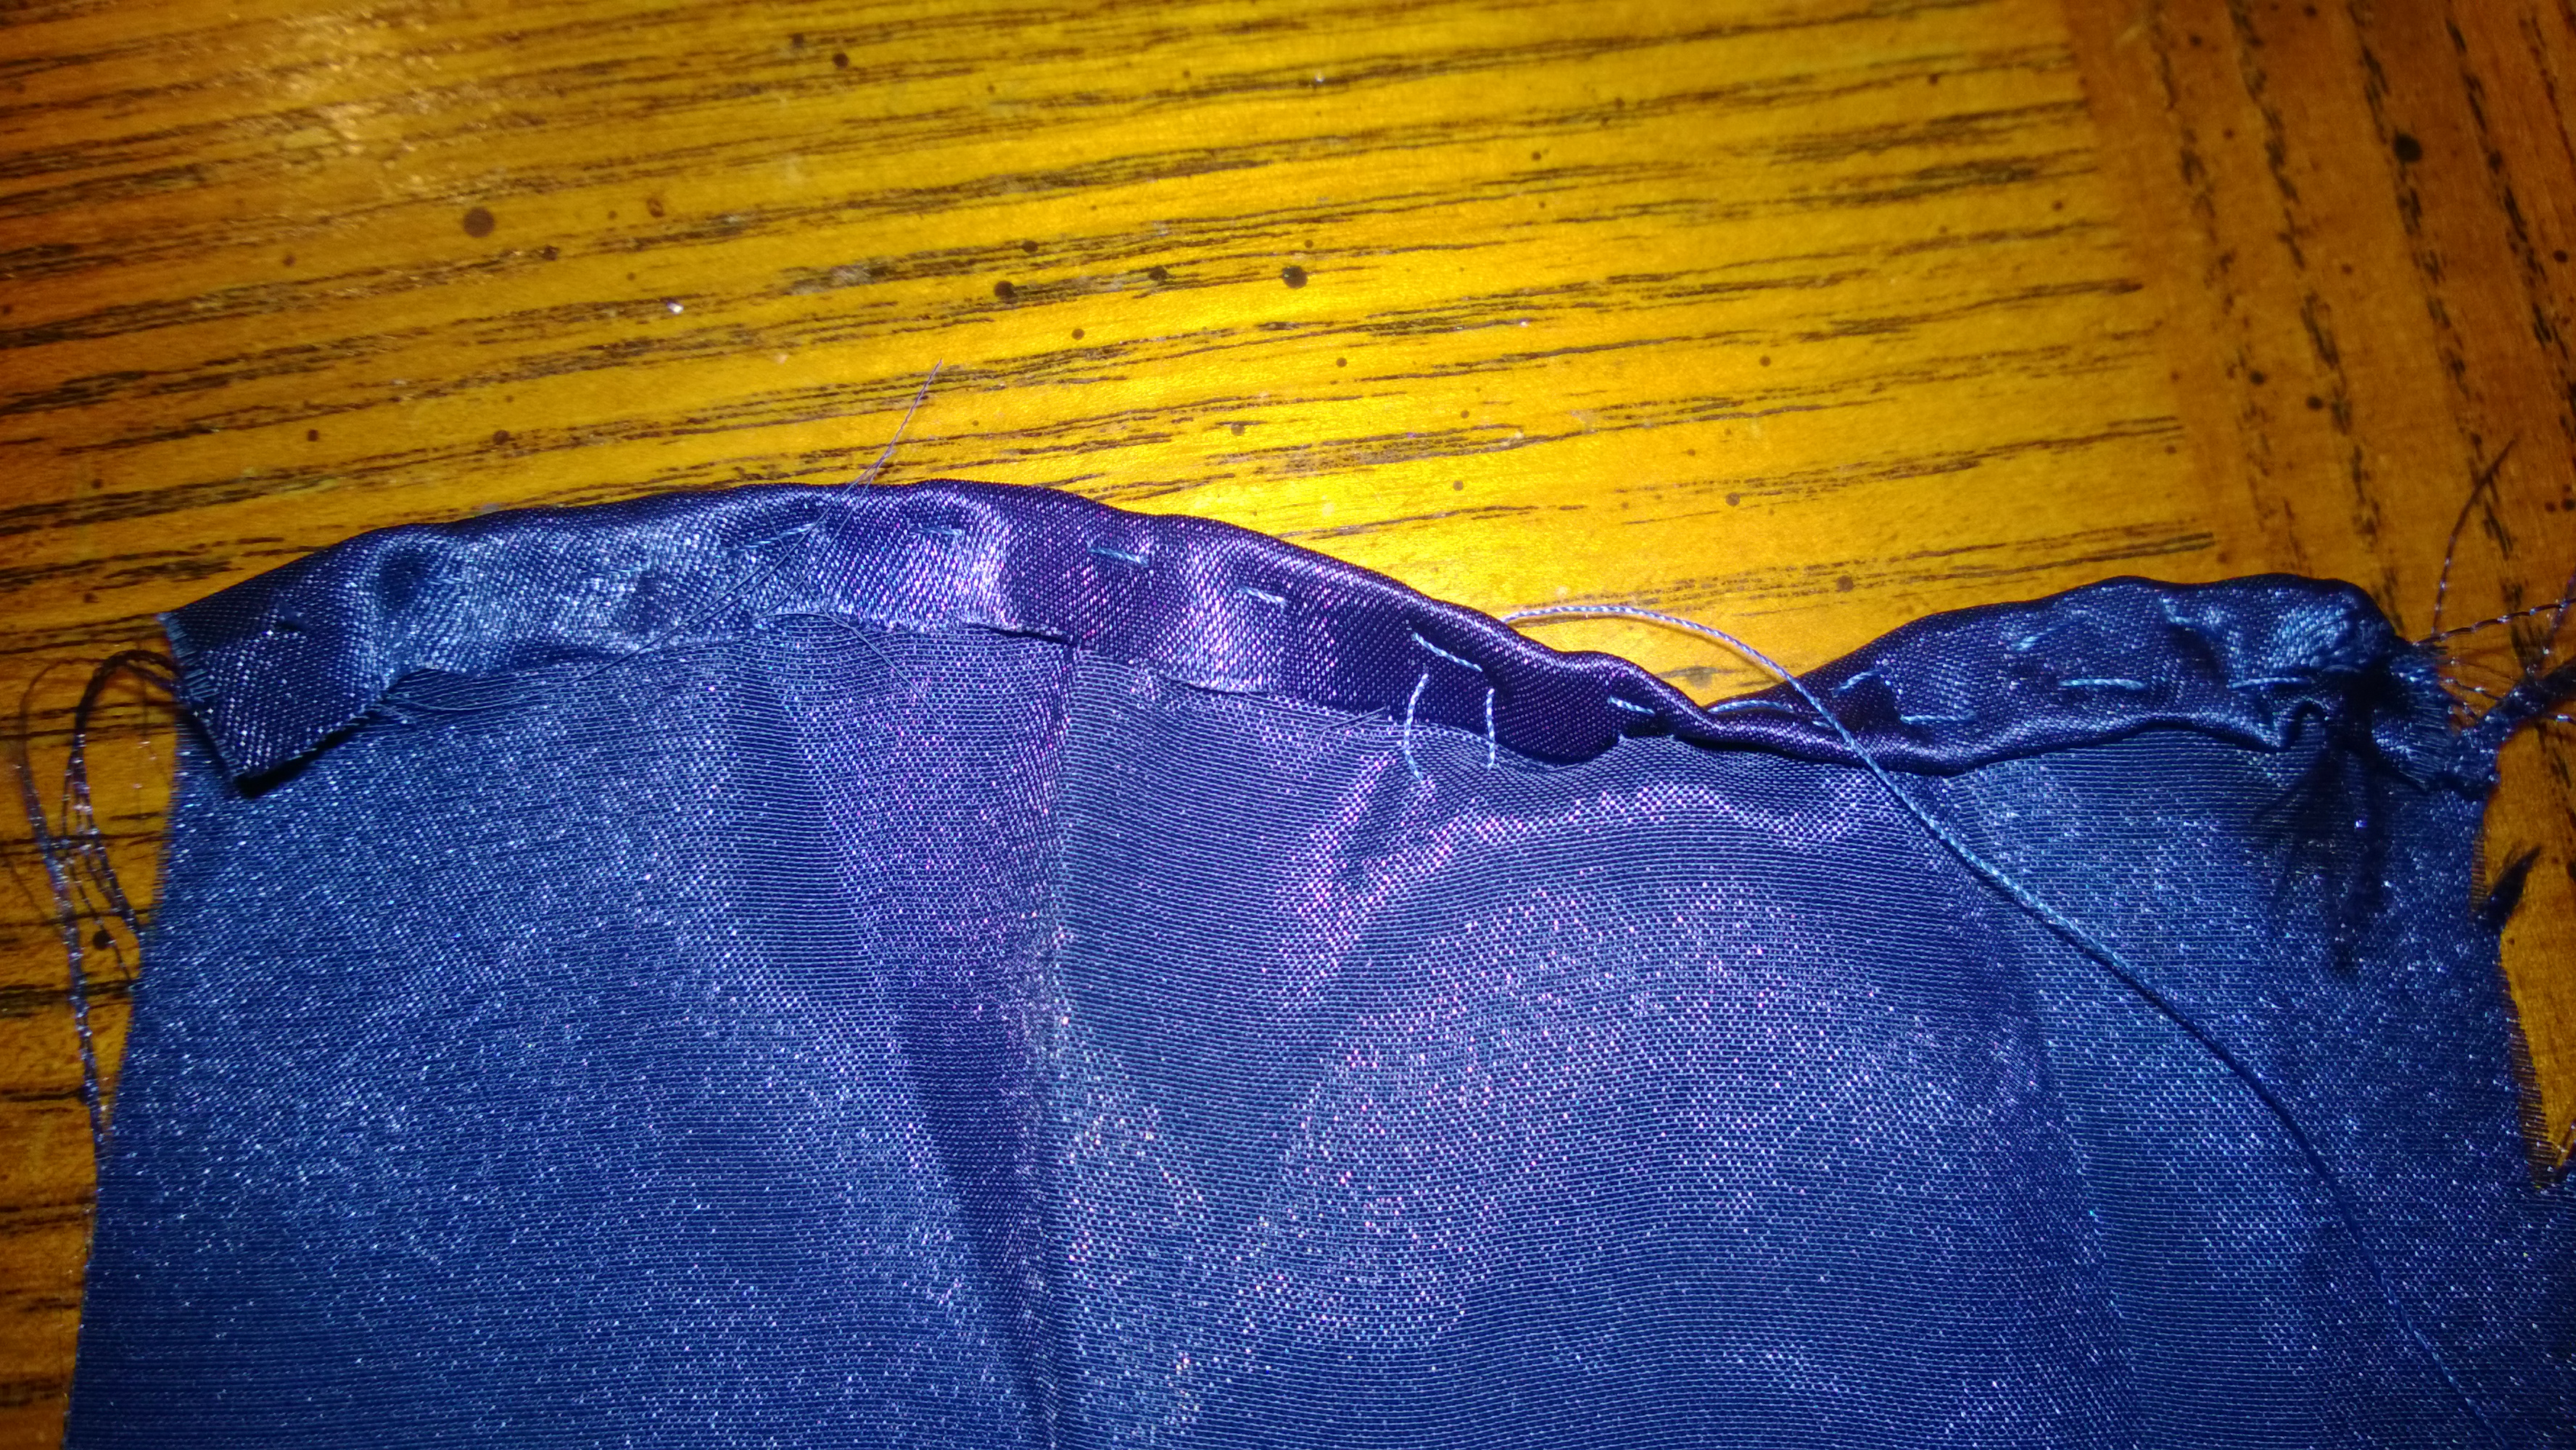
3) First pass with thread and needle. You don’t have to, but I found it easier to hem the non-angled bits. The way I did this was for each edge, I first did a simple hand stitch over a single fold of fabric. (This is more effective then pinning a hem in place.)

A single line of hand stitching holds a fold in place for easier hemming

Stitching only a single fold in.

As I’m sure you’re aware, fold towards the wrong side of the fabric, if you have fabric with a right / wrong side. Also, be sure to fold consistently towards one side. Nobody makes a banner to see the folded edges- that’s just silly.

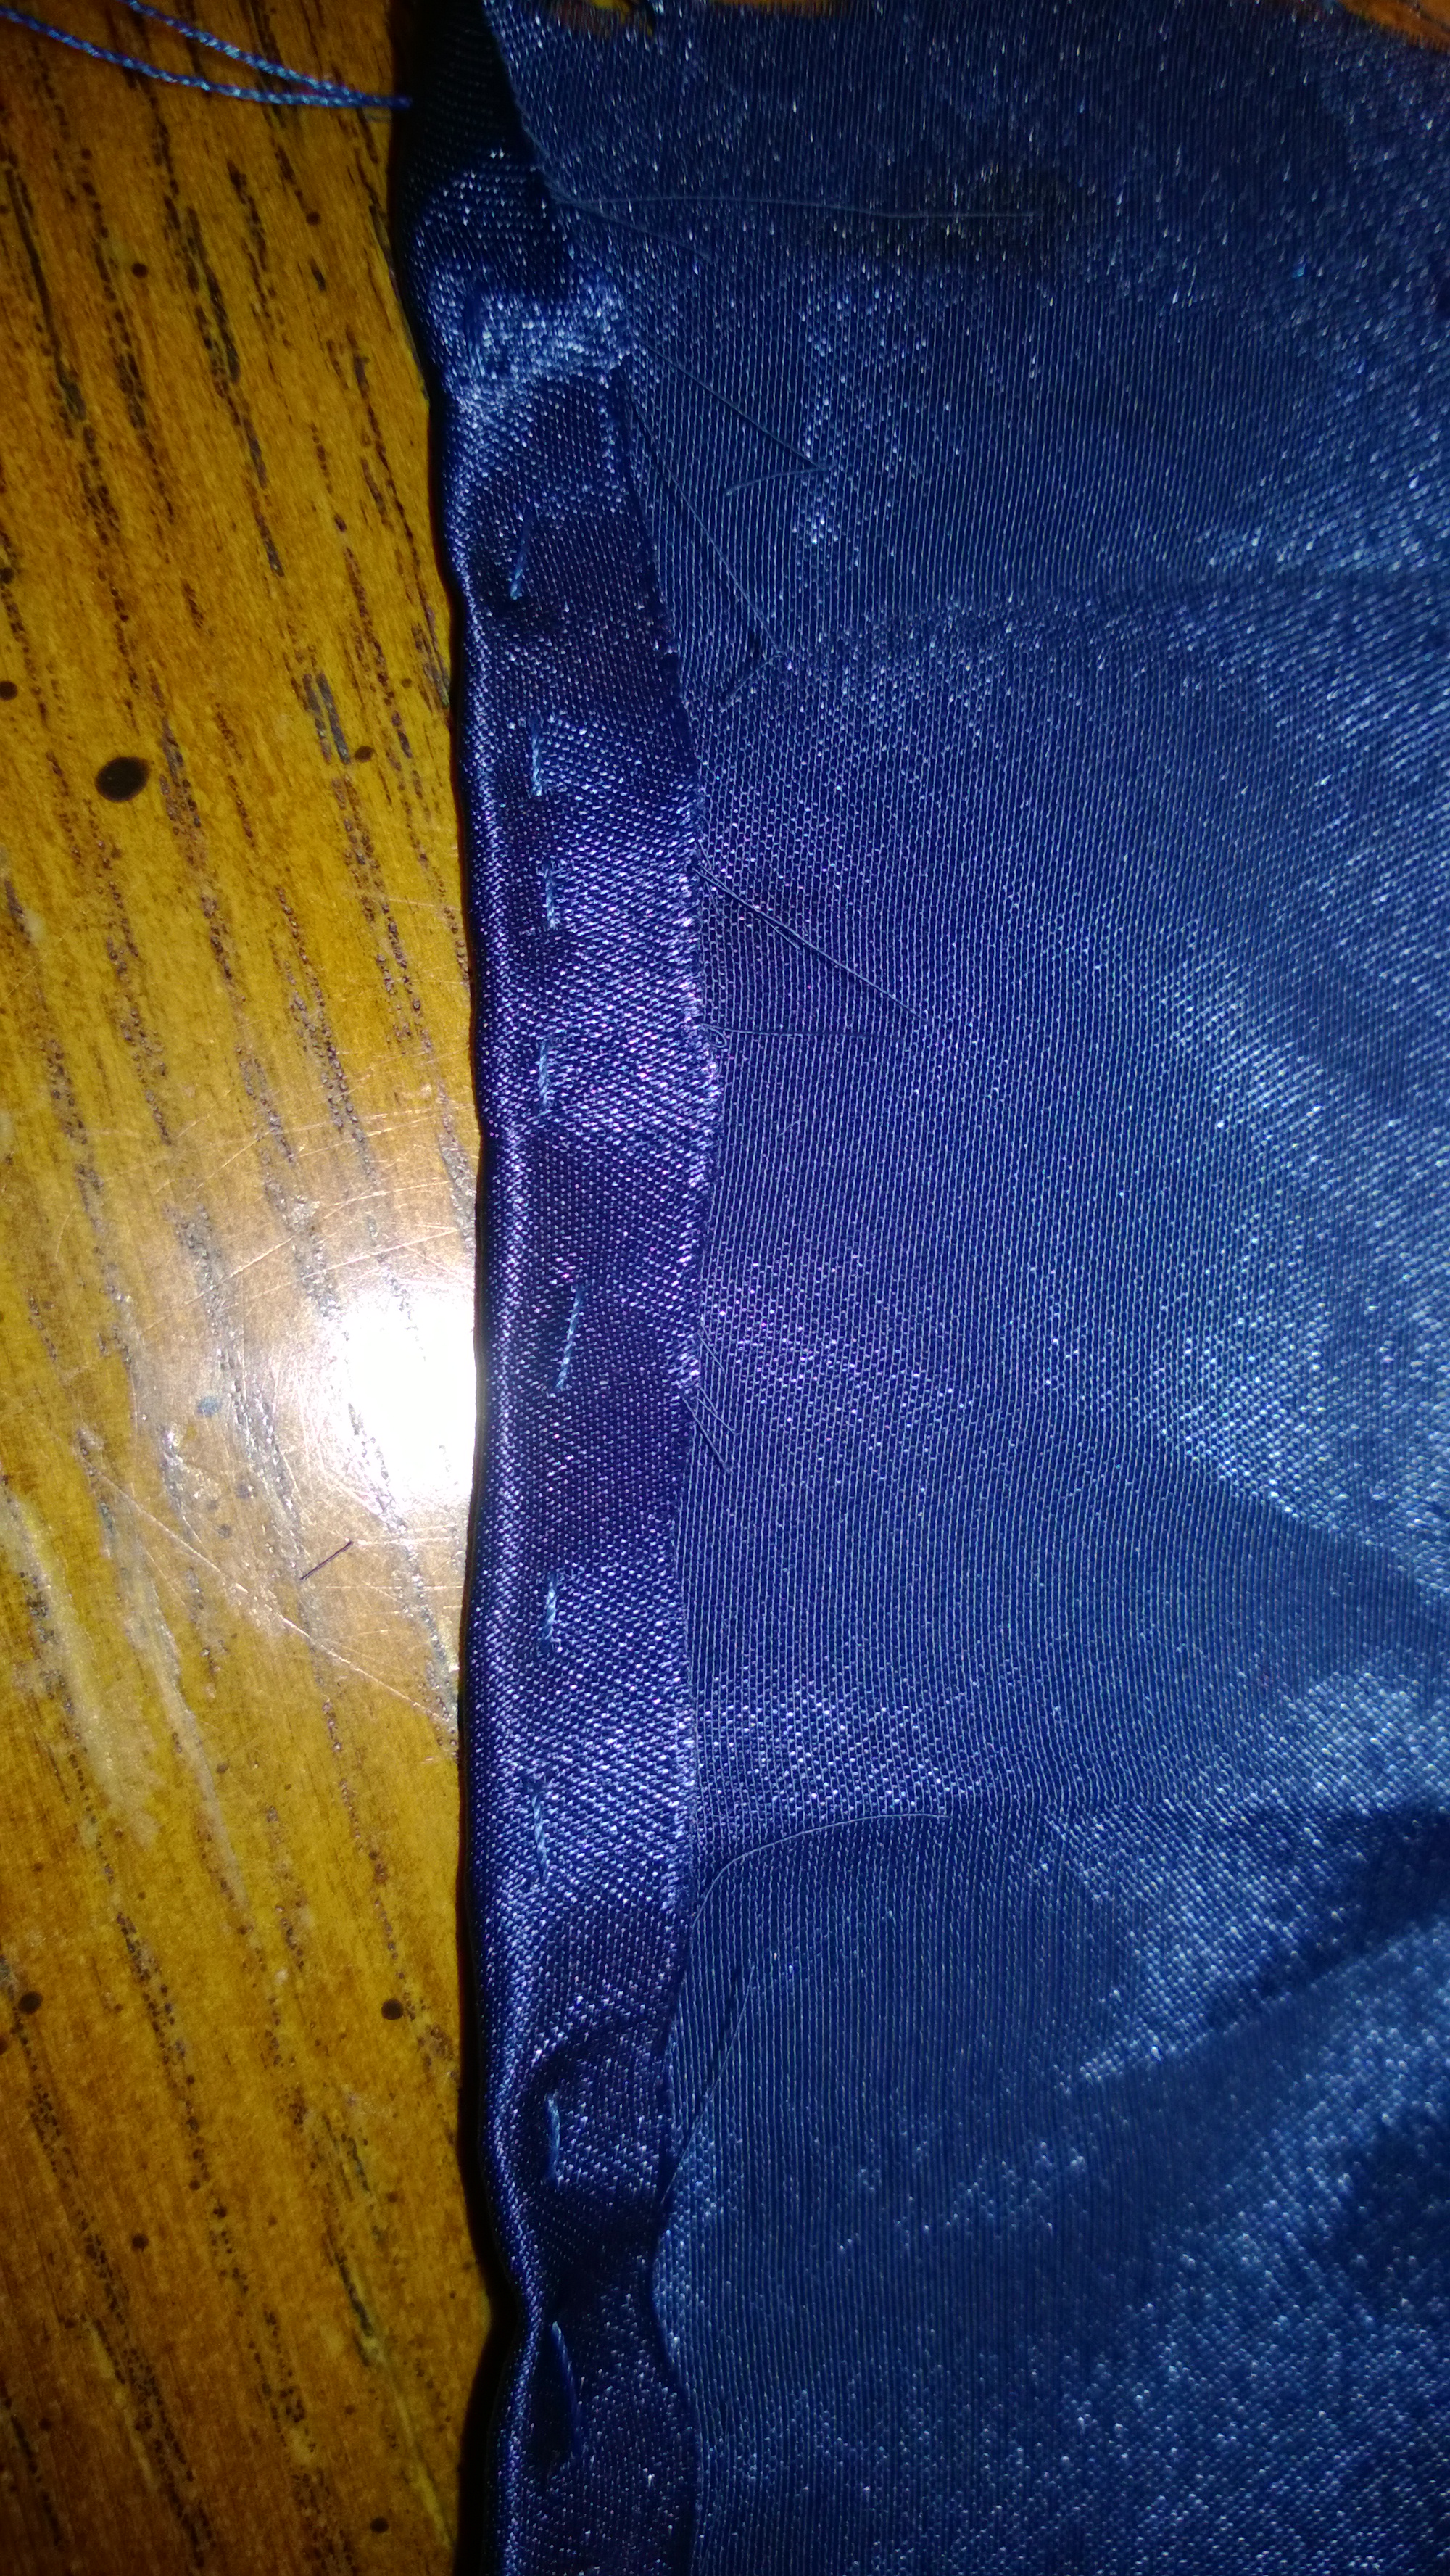
4) Make it into a hem. What I personally did was I got one edge hemmed before moving onto the next edge. Looking back on it, it might make more sense to make a first pass on all the edges, and then convert them all to actual hems. If you try that, let me know how it works?

But anyway. For those who don’t know how to do that, basically just take your edge and fold it over (towards the same side) again. The point is to hide the unfinished edge so that it won’t fray. This is especially important with fabric like the type I was using that frays waaaay too quickly.

A partially hemmed edge. One part is only single-stitched- the other part is hemmed all the way.

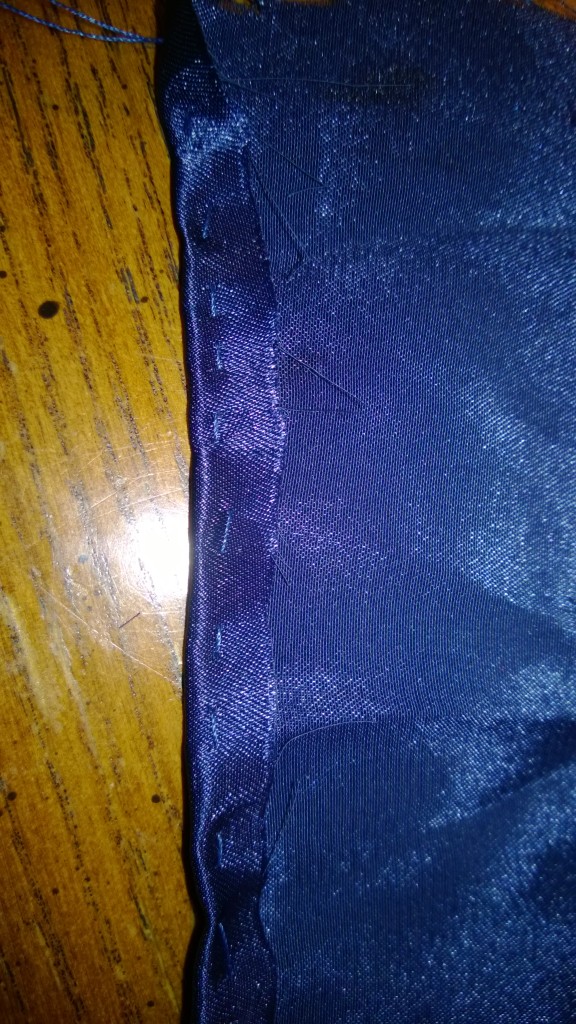
An example of what the hemming will look like

As you hem, it should look something like the photo above.

Do this for all of your straight edges.

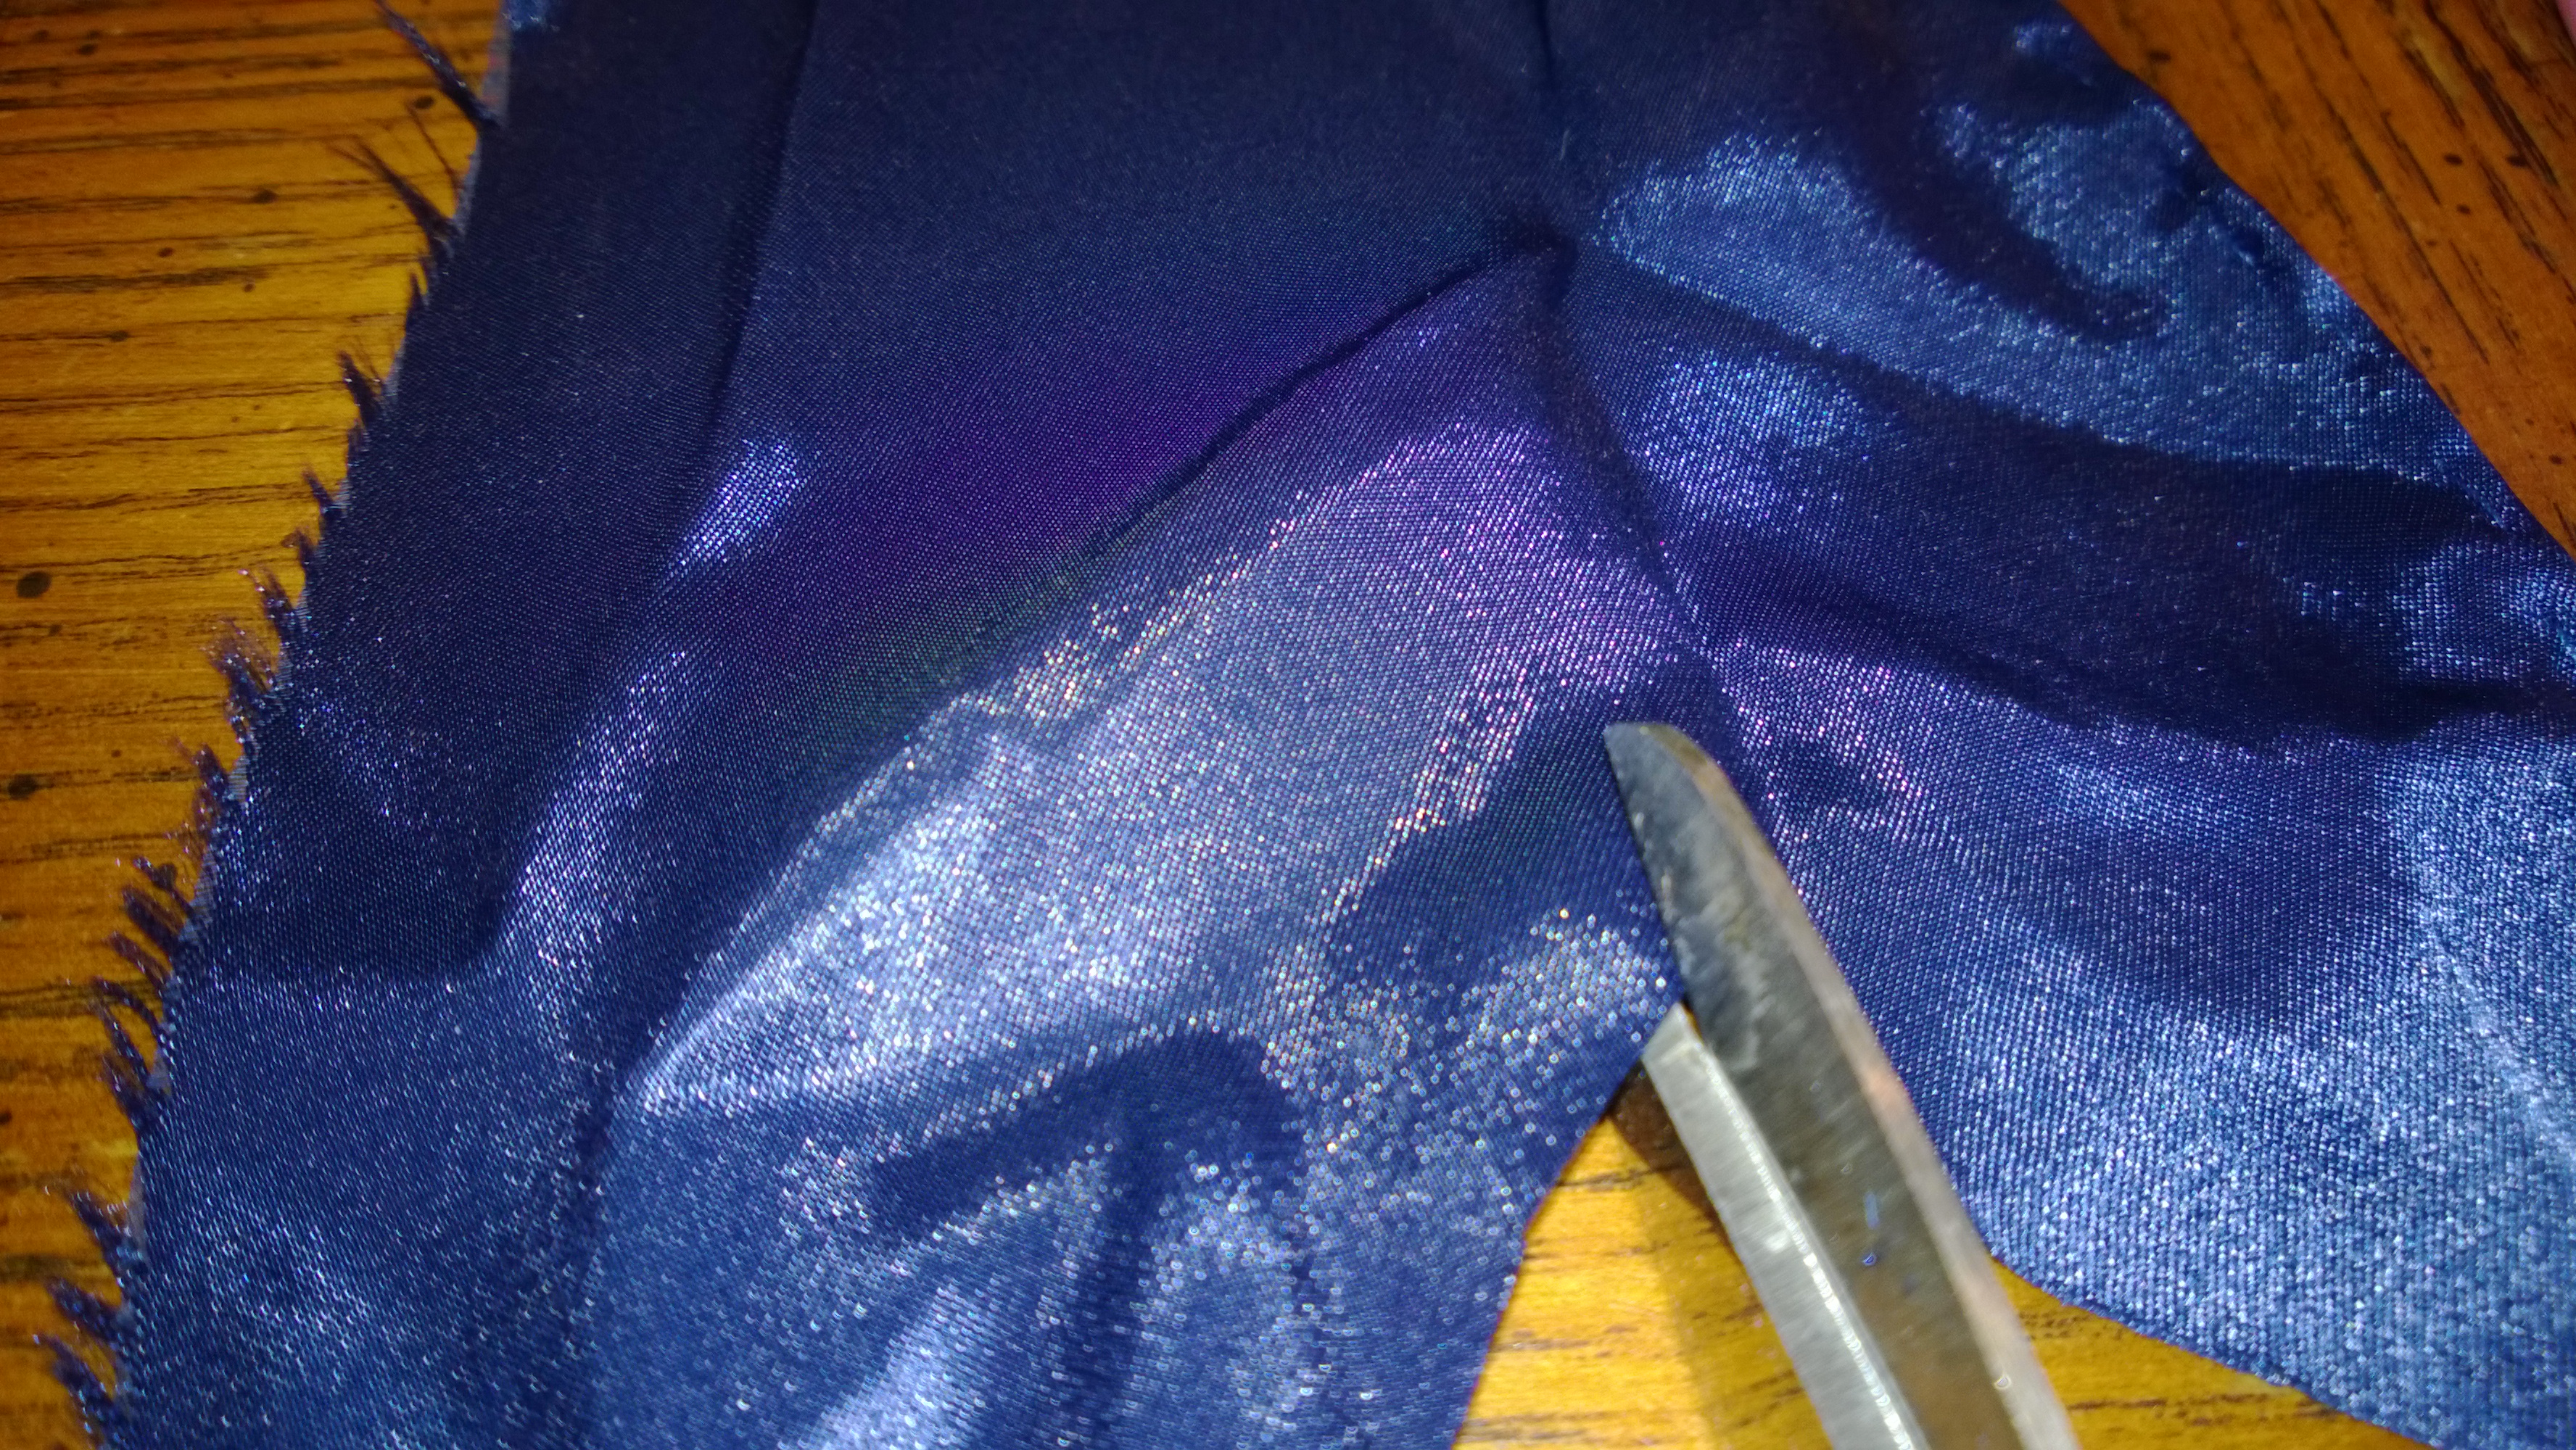
5) Deal carefully with your angled edges. To get them to work better, you’re going to want to make a slit up the middle of the banner. A small slit will do- this is just to allow you to hem each angle a little more easily, and still have a relatively tight corner there at the bottom. Then, repeat the steps that you did with the straighter edges. (You know. Fold once, stitch down, fold again, stitch again.)

Scissors cutting a slit in the fabric to let tighter corners be hemmed

Add the slit to your banner to allow for tighter corners.

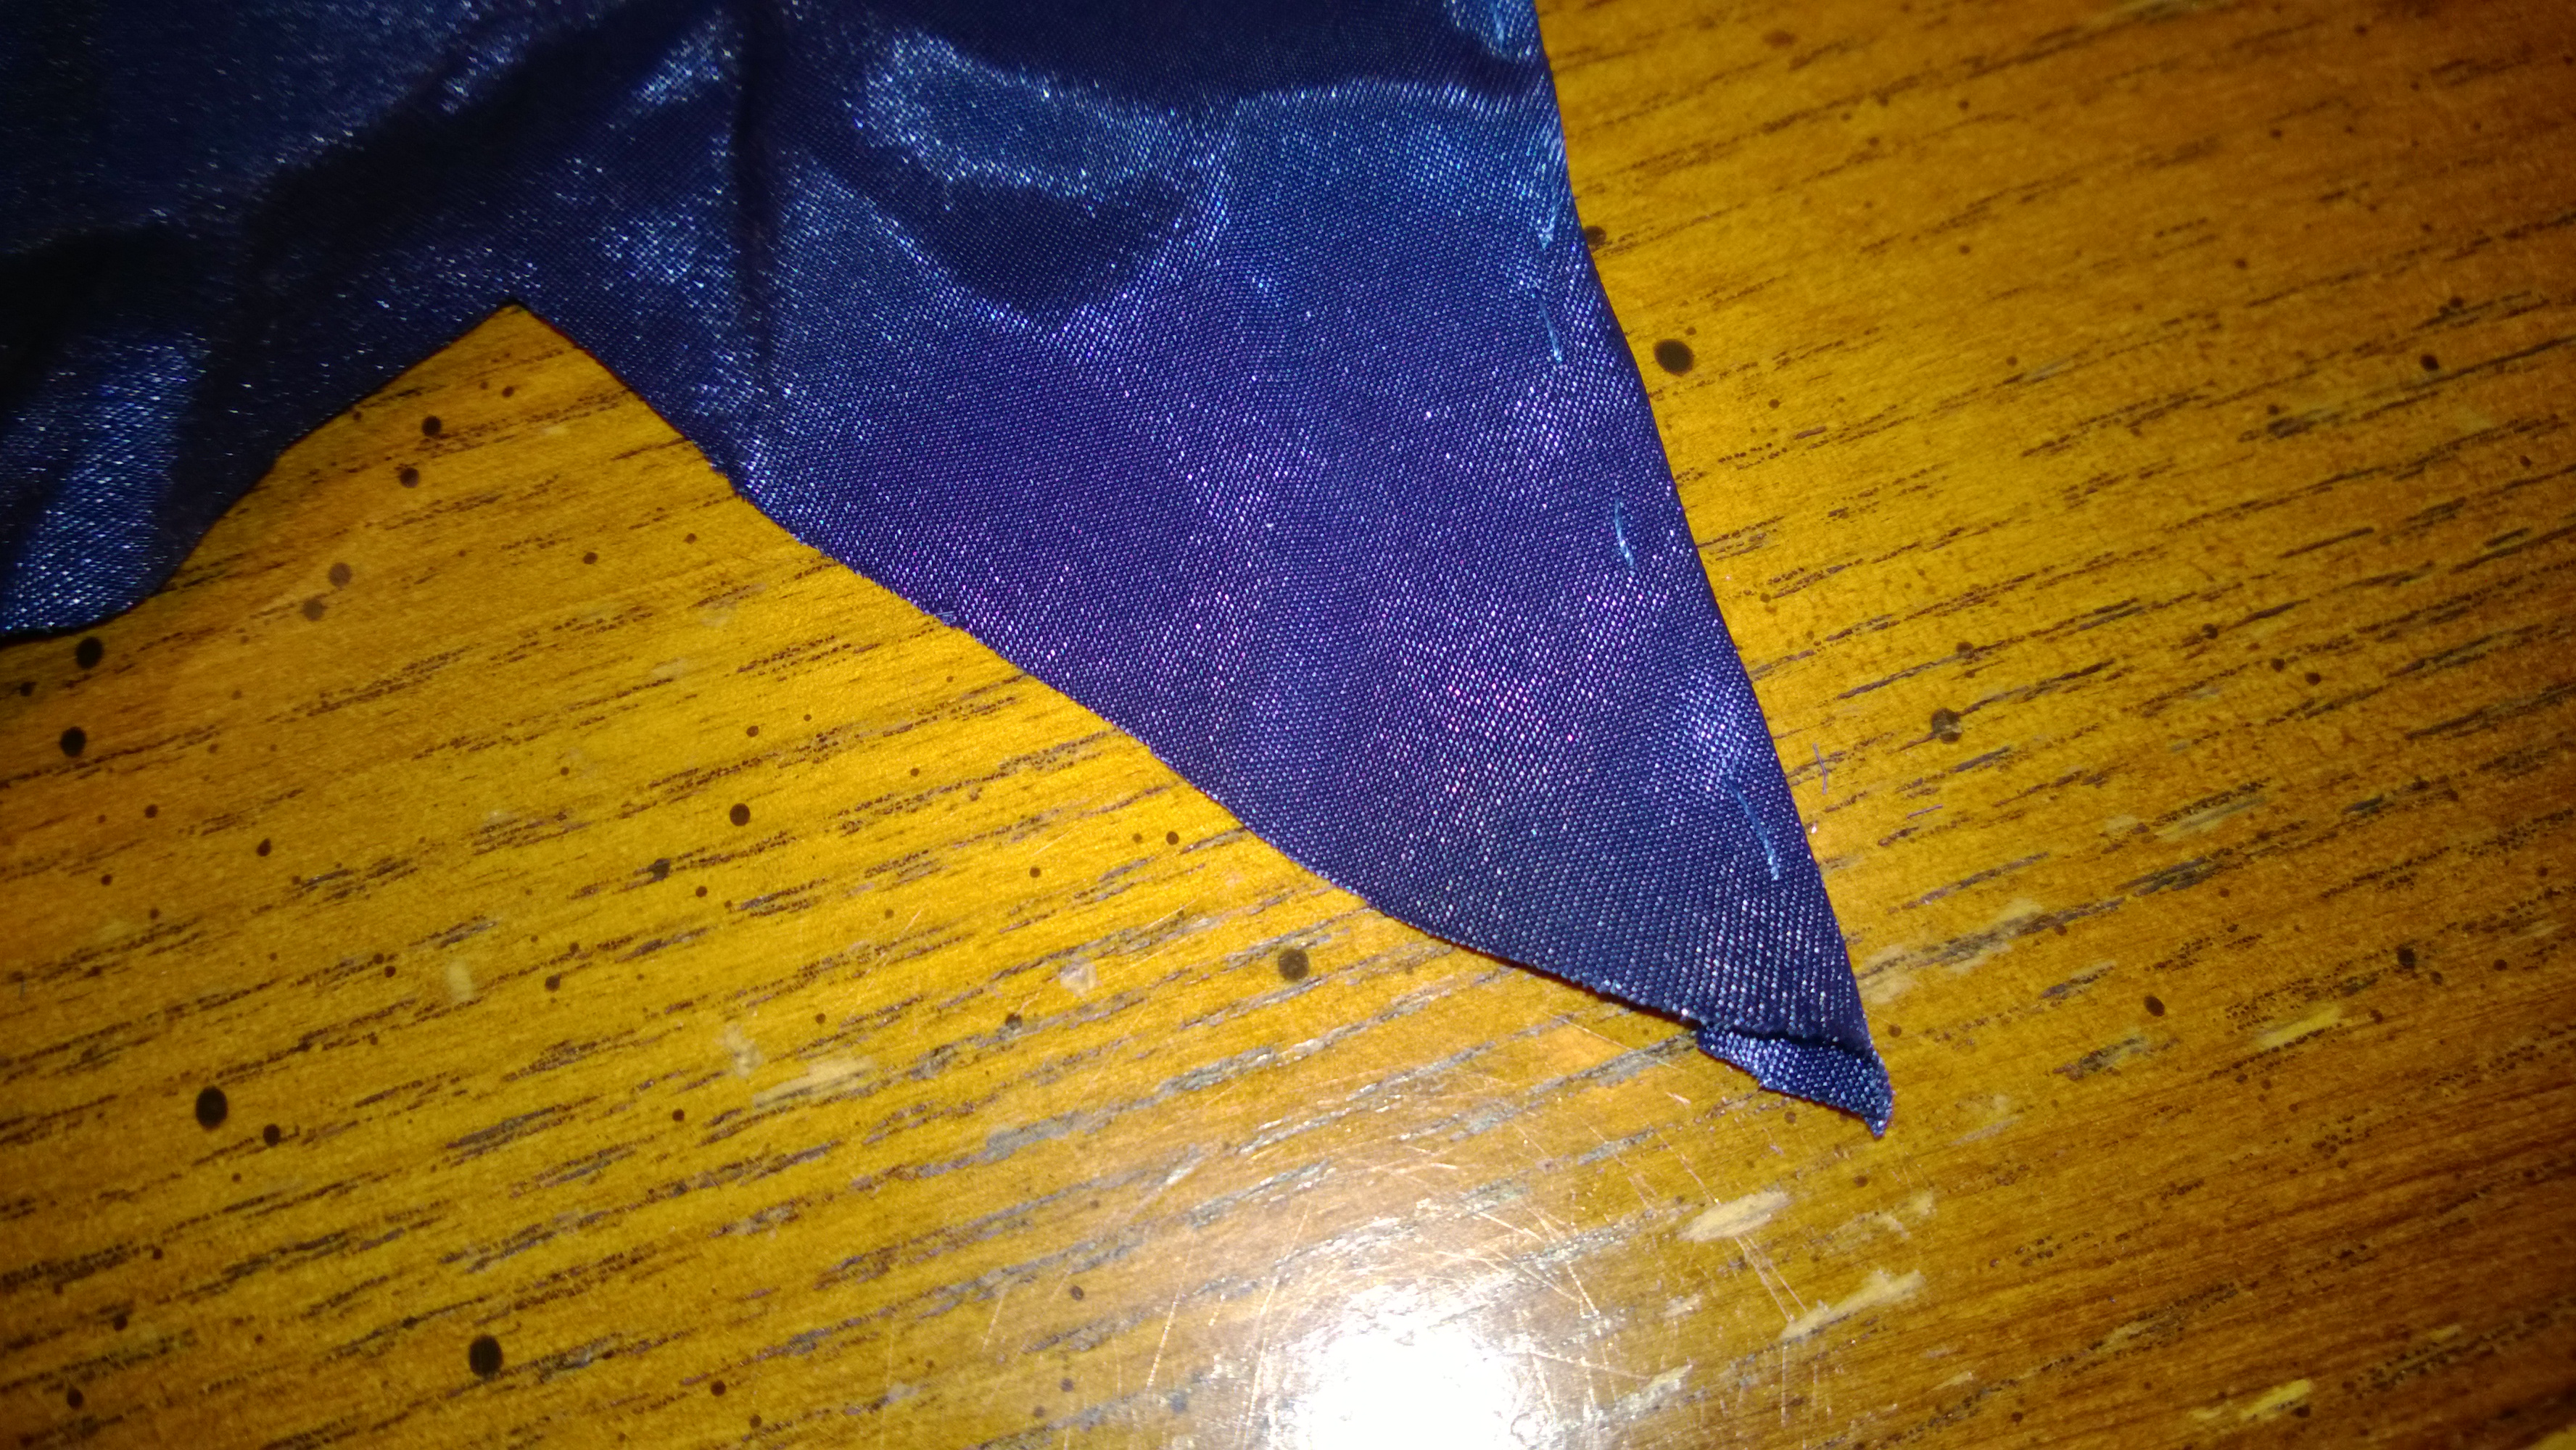
6) Trim extra. When you’re done rolling / hemming the angled parts, you’re going to get a few awkward parts hanging off the end.
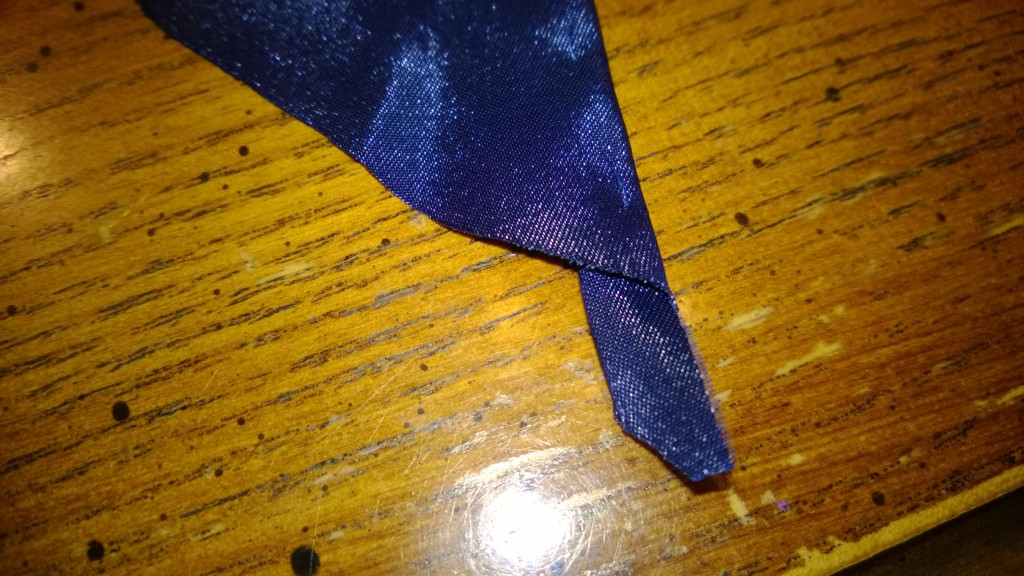
weirdly shaped corner part

Awkward corner.

Just trim that part, to make it even with the rest of that part of the banner.

even corner part

Trimmed corner part

7) You’re done with the stitching! Now, on to painting!

The fully stitched (unpainted) miniature banner.

Finished stitching! Paint, and you’re done!

As I mentioned, I just used craft paints of various sorts. I ended up freehanding everything. That’s primarily because I don’t own any decent stencils of any sort. Painting is completely up to you. The key thing to remember is to have fun! This is probably one of the cheapest crafts you can do, since in theory you’re only using leftover scraps. So yes, you’re paying for paint. But you don’t need that much for the motifs. In all, it’s fairly inexpensive.

As always, if you make one, please comment or send me a picture? My email is webmaster [at] totalfluff.com . (Clearly use the “@” instead of [at]. No spaces, either. Those are simply there to prevent spamminess, I hope.)

Happy Wednesday! And happy crafting!

Future Posts

Note: If this is your first time to TotalFluff, please visit this brief explanation. Thanks!

Hello, Fluffsters!

Happy Tuesday!

I had a lot of fun last night. I spent time actually doing crafts. I haven’t had time to do that in quite a while. (Or the supplies…)

That being said, I owe you some slightly longer posts. In fact, I owe you some specific posts.

First of all, there’s the details on the type of fluff / “food” the cafeteria I go to has served since my last “food” post. (To any grammarians out there, yes, the quotation marks are intentional.)

Second, there’s the post that I was sort of working on and meant to write tonight: A tutorial on painted banners. I don’t even know how many pieces of fabric I’ve painted tonight! A lot. That’s for sure. And it’s been a lot of fun! Here’s an example of one of the ones I painted tonight:

A scarlet banner with a gold rim and a black and gold painted cross

Red Banner with Painted Cross

Hopefully I’ll take the time to give you a tutorial on how to make the sewn banner I made… (not this one.)

I hope your week is going well!

DIY Housewarming Card

Note: If this is your first time to TotalFluff, please visit this brief explanation. Thanks!

Hello, Fluffsters! Remember how a bit over a week ago I ruined a pair of pants doing a craft project, and I said I’d share photos with you in a while, because it was a gift for someone?

Well, today’s your lucky day, because I’m about to share the photos with you!

“Your lucky day”? Really, Webmaster? Do you try to come across as arrogant, or does it come naturally to you?

…Says the know-it-all in the computer…

But I digress.

DIY Housewarming Card

So, here’s the end result:

Closeup of the Housewarming Card: Sideways view

Housewarming Card Sideways view closeup

A fuller view of the house warming card

Full view of the Housewarming Card

I didn’t do a professional looking message, but I did write a personal one. So I don’t have a picture of the inside. But really, it’s nothing very special.

Here are the instructions for how to make it.

1) Find a light-colored piece of cardstock and a brown piece of cardstock. I chose white and dark brown. Clearly. The white is the main color, the brown is the roof and door color.

2) Cut them in half vertically. Keep one piece of each color. You won’t need the other scraps.

3) Fold in half. The end result is that you have a card that’s about a quarter of a page in area. Half of the length by half of the width. Basically, this is to make it fit in a greeting-card-sized envelope. (Normally they’re called “invitation envelopes”, I think.)

4) On the white cardstock, trace a house shape. Note where your fold is. The way I did my house was I kept the fold to the left of the “floor”. So in the bottom right hand corner, I traced a rectangle. Or a semi-rectangle. If the angles are not perfect right-angles, it adds a cute, quirky look to the card.  For the roof, start at the corner where your rectangle left off. Figure out what angle you want your roof to have. Trace that angle. Note what your angle is, and draw a similar angle down. Note: Do this on the “right” side of your white cardstock. If you want to add a chimney, find a location on your slanted roof. Trace a small semi-rectangle.

5) Cut out the shapes. Hold both pieces of cardstock together, and cut. In this instance, you probably want the brown on the inside so that you can see the traces. Be sure to keep your pieces of cardstock folded! Note: I didn’t do this, but you could cut the brown cardstock in half, on the fold, before your cut out the shapes. That might make it a bit easier in future steps.

6) Shape the brown cardstock. Find the bottom of the roof. I scallop-cut across where the bottom of the roof was. From the remaining cardstock, you can cut a thin(ish) rectangle to be your door. Looking at the dimensions, I think it was probably about a 1×2 inch rectangle. Start off with a bit bigger than that, and trim it down to an appropriate size. Also, cut out 4 thin strips of cardstock to make windows with.

7) Glue. First, you want to glue the brown of the roof to the top of the white card. Try to make it line up. After all, you cut them to exactly the same dimensions… So it should work, right? Then you probably want to glue the door. Find where it looks reasonable, and glue it down. This is your card, so you have flexibility here! You can look at the pictures of mine for a reference, if you wish. After you get the door done, you’re going to do the window. Ok, so I’m going to suggest you do it differently from how I did it here. I recommend spreading glue in a rectangle, and then pressing the little strips of cardstock you made onto the glue. What I did was I glued down the cardstock, each piece with its own glue squirt. I realize now that it wasn’t the best of all possible ideas… If you do go with my original way, you will then want to spread a thin layer of glue on the inside. When the glue dries, it leaves a shiny appearance. This will give your “window” a slight “glass” effect. If any of you are artistic, or if you know what the inside of your friend’s house will look like, you could probably past a picture of their house behind the “window.” That could actually be really cute! Let me know if you do that?

Anyways.

8) Paint / decorations. I happened to have a bit of gold paint on hand. I took a very fine tipped brush and painted a doorknob onto the door, in addition to the location’s street number there at the top. At some point in there I also ended up sketching “shingles” onto the roof. That’s totally optional. I’m not sure I like how that part came out, but it was probably worse just having straight brown. So all in all, I think it was the better move.

Happy Sunday, Fluffsters! Have fun! If you do end up making a card like this, do let me know! (I’d also love to see pictures.)

DIY Letter Holder in a Book

Note: If this is your first time to TotalFluff, please visit this brief explanation. Thanks!

It. Always. Happens.

Please. Don’t tell me. I’ll be happier not knowing, I’m guessing.

No wait, let me guess: Your stalker rainbow appeared again?

Ha ha, very funny. No, that’s not it. It’s actually relatively simple this time.

You see, I journal. Every night, for the past 2 and a half years or so! And frequently (but not regularly) for the year and a half before that. But I digress.

Good, inexpensive journals are limited. I really like ones that have card and letter holders in the back, just on the off-chance somebody will send me something. (I’m a bit of a pack-rat when it comes to things like letters. And things from people.) So the journal that I used up most recently had one in the back, and nobody sent me something worth keeping during that time.

And this current journal? It’s lovely. I really like it! But it doesn’t have a card-holder in the back. So, naturally, this is when people start mailing me things. Now don’t get me wrong, I love mail! I’m thrilled at the mail! I’m annoyed at the journal.

So I decided to add a letter-holder.

DIY Book Cover Letter Holder

What I did was I found a piece of cardstock that was a suitable color. I then folded the two shorter sides to have a double fold. (It makes a zig-zag; the edge points in.) I then glued it to the inside back cover. It’s not the tidiest I’ve ever made, but it should be functional. And if not, I’ll probably be able to take it out and start over.

cardstock book-cover letter-holder

Top of the letter holder

The DIY book-flap letter holder opens

Front of the holder. See how it opens?

One thing of note: if you can cut at a bit of an angle, that would probably be better. You want the most “height” (so the most folded-under-ness) to be at the part where you open it. So, you glue down the two shorter sides and one of the longer sides. You make sure that the other larger side has extra fold-space, so that it can open further.

If you have any questions, let me know! Happy Thursday, everyone!

Five Uses for Feather Boas (Alright, Ten)

Note: If this is your first time here, please visit this brief rundown. Thanks!

Happy Tuesday, folks! I hope your week started off well.

Well, with Irish music like what I found yesterday, how could it not have?

My, aren’t we full of ourselves today?

Oh, you are too?

Anyways, I’m here today to talk to you about one of the most delightfully fluffy fashion accessories on the face of the earth:

The Feather Boa

A Feather Boa? Snakes on your world have feathers?

Oh. No. Not that type of boa. No, Feather boas are a fashion accessory! They look a bit like this:

An Illustration of a fuzzy furry feather boa

Purple Fluff, in Accessory Form!

How GHASTLY!

Uh, what?

So. Flippin. Fuzzy. What do you even do with it?

Ah, how convenient! That leads me to the topic of:

Top Five Things to do with a Feather Boa

1) Wear it around your neck. It’s sort of like a big long feathery scarf.

That… would clash with everything. And it would get itchy.

Hush, Fluffy! Will you let me finish? Please?

Ok, ok, sorry. Finish your list…

Thank you. So as I was saying, if you wear it around your neck, it’s like a really long feather scarf. And really warm! After all, that fluff traps a lot of heat. It’s great for cold winter days.

2) Cut it to an appropriate length, and use it as a headband. Like with the scarf, it will keep your head warm. And be quite the daring look!

3) Give it to a child for dress-up. It adds instant class to any child’s wardrobe, and will let her have a lot of fun. The boas come in all sorts of colors! Hot Pink? Instant princess! Black? You’re princess Batman! Lime Green? Celebrity. And there are so many more!

4) Give to a child as a toy. And now the child can use it with her stuffed puppy as a leash! And that leash has such class.

5) Decorating. I haven’t actually tried this, but I imagine Red and Green Feather Boas can so easily be used to add festive cheer. Put them on the walls, around the windowsill, or anywhere where you’d normally use tinsel. This would provide a softer look. Let me know if that works? I imagine you can use pastel colors for a spring look. And so many more!

Well, there you go! Happy Tuesday!


I think this is where my main purpose comes into play… That was WAY to fluffy to be healthy. So, here we go:

Top 5 Things Fluffy Would Like to See Feather Boas Used For

1) fire-starters. Assuming they’re not made of non-flammable or toxic material, all that fuzz looks like it would start a fire amazingly. At the very least, it would get rid of the boa.

2) Fluffifier Decoys. Wanting to know who in the room is way too obsessed with fluff and fuzz? Pull out the feather boa. Toss it in some random direction. Watch and see how many people in the room go after it. Congratulations, you’ve now found all the Fluffifiers in the room!

3) Cleaning rag. Hopefully, by the time you’ve used it to wash enough greasy dishes, it will no longer be so… fluffy. At the very least, it will probably be a lot grungier, and therefore slightly less obnoxious.

4) A slingshot. And if you use sharp enough rocks or other projectiles, the fuzz will start to wear off. No more Feather Boa! Yay!

5) A rope Ladder. To a tree-house. Eventually, all that will be left is the base. And who knows, it might even attract more birds! And once again, you achieve the purpose of “no more feather boa.” And besides, what tree-house doesn’t need a snake-like creature hanging down from it?

And with that, readers, happy Tuesday!

What else could be fluffier?

Hello, everyone!

So, a group I know about is collecting crocheted baby clothes to give away. And so do you know what that means? I HAD A LEGITIMATE EXCUSE TO BUY BABY YARN!! and USE IT!!

What, buying inspiration for your website’s color scheme wasn’t enough?

Please. I’ve already designed the color scheme. How can I be buying the yarn for inspiration?

Don’t look at me. You’re the nefarious one who’s occasionally mentioned the equivalent of time-travel on other pages.

Just to clarify… You’re saying that I’m smart enough to have figured out how to go back in time, to change the color scheme, to reflect this post? I’m honored!

But… wait. That doesn’t even work; I couldn’t find yellow yarn, so the yarn doesn’t actually match perfectly! Oh, dear! What’s the point of being a time-traveler if I lose all my ability to color coordinate?

You call this website “color coordinated”?

Well, I try. And seriously, here are the hats:

Fluffy Baby Hats

FLUFFEH!

See? They hardly map to the website colors! They’re totally missing yellow. And they’re not gradiented at all. They clearly didn’t inspire the website colors…

Although, now that I think about it, the website’s colors might have impacted which yarns I bought… Huh.

You seriously bought yarn to coordinate with your website?

I think I’m not going to actually answer that one…

Anywho, happy Saturday, everyone! I hope you all have a wonderful day.