Category Archives: instructions

The Caffeine System

Note: If this is your first time to TotalFluff, please visit this brief explanation. Thanks!

Hello!

I’m prewriting this post a couple days in advance, actually, due to stuff coming up. I will probably not get very much sleep during that time.

First, a tiny bit of relevant background. I’m going to have a strict timeframe (48 hours, starting at noon one of the days) to do a thing that will involve minimal sleep. Because I have this specific timeframe, I’m able to try to prep for it.

So, I thought I’d share my caffeination prep I’m using!

(As a second note, I’m usually at a higher-than-necessarily-recommended level of coffeenation. Yes, I spelled that intentionally.)

For the better part of the week leading up to the thing, I worked on getting myself (relatively) off caffeine. So, a couple days of no more than half-caff, or usually decaf.

Then, no more caffeine than available in a cup of green tea, and herbal tea for the rest of the time.

In addition to helping me get off caffeine, this allowed me to catch up on sleep a bit.

4 and 3 days before The Thing, I added a normal cup of coffee back into the mix. You see, I don’t want to be completely off caffeine before starting. That can lead to unanticipated jitteriness, and hypercaffeination by mistake, which would cause problems.

2 and 1 days before The Thing, I was back to the half-caff / decaf route. (Less than the equivalent of one of my usual size cups of coffee, though.)

This enabled me to get sleep. At least, theoretically. I had a couple issues between night 2 and 1, but that was probably at least in part due to being on YouTube. That’s a very distracting rabbit hole! So really, the system can’t be blamed.

And now (well, as you’re reading this, not as I’m writing this) I’m doing The Thing. Since it’s worked previously, I’m guessing it will work now to help keep me awake.

I hope that helps, next time you have 48 hours where it’s nice to not need to sleep!

have a lovely Tuesday!

PSA: DIY vs “Life Hack”

Note: If this is your first time to TotalFluff, please visit this brief explanation. Thanks!

Greetings, readers.

I have encountered a new problem on the Internet concerning terminology: People are getting confused between “Life hacks” and “DIYs”.

I am here to elaborate.

If you are making something yourself that you can purchase, such as a cat bed using hangers and a t-shirt, that is a Do It Yourself (DIY) project.

If you are doing something to make life easier, that does not end up as a final product that you could sell for money (such as heating towels in the dryer right before giving a dog a bath, to make the dogs less unhappy about the cleaning ritual), that is a life hack.

Thank you, and have a nice day.

How to Have a Conversation

Note: If this is your first time to TotalFluff, please visit this brief explanation. Thanks!

Hiya, Fluffsters!

As you may have noticed, one of the things I like to do is talk. And interact with people. I like conversing.

Sometimes, though, it seems as though people don’t know how to carry on a conversation. So I have some tips for you today!

1) Listen. Or pay attention to what the other person is saying. This is one of the more common tips. This brings us to point 0.

0) Know how to ask questions. If you don’t ask questions, or guide the conversation in any way, you might be stuck with the annoying awkward silences. This is also a way to start conversations.

So assuming you’ve gotten through points 0 and 1, which help with the starting the conversation and stuff, here are some tips for keeping a conversation going.

2) Ask follow-up questions. Is your chatting-buddy doing something interesting in her life? Has she said that she’s going to be writing a paper soon? Ask her what it’s about! (Unless it’s obvious… You know, pay attention.) Has he said he’ll be going home for the summer? Ask if he has any plans in mind! It’s not that difficult… sometimes.

3) Turn-the-question. If you’ve been answering a question that can be turned around to ask your chatting-buddy, do so! Have you been answering “what plans do you have for Memorial Day?” Ask him back!

And with those simple steps, you should be able to keep the conversation going for at least 10 seconds.

Have fun conversing!

A Slightly Different Way to Use Skype

Note: If this is your first time to TotalFluff, please visit this brief explanation. Thanks!

Hi, Fluffsters!

Last night, due to random interweb spazzigoofiness, a friend and I discovered a different way to use Skype. It was quite fun, and it actually worked pretty well!

Unconventional Way to Use Skype: Directions.

A) coordinate with the person you’re skyping to use this setup. (It wouldn’t work as well if you’re the only one doing it.)

Second) video-skype with them. (This is necessary.)

3) Turn off sound / Mic. (Keep video on.) This is also necessary.

Next) Let hilarity ensue. (Acting out emoticons is only semi-optional. Especially since the Skype ones are so animated.)

Have fun!

Tutorial: Make Fake Windows in Photoshop (With Some Pics)

Note: If this is your first time to TotalFluff, please visit this brief explanation. Thanks!

Hey, Fluffsters!

Last night, I was up a bit too late again. But that was in part because of writing this post. But enough excuses. The main reason I stayed up too late was because I discovered a fun technique on Photoshop. I found a way to make fake windows!

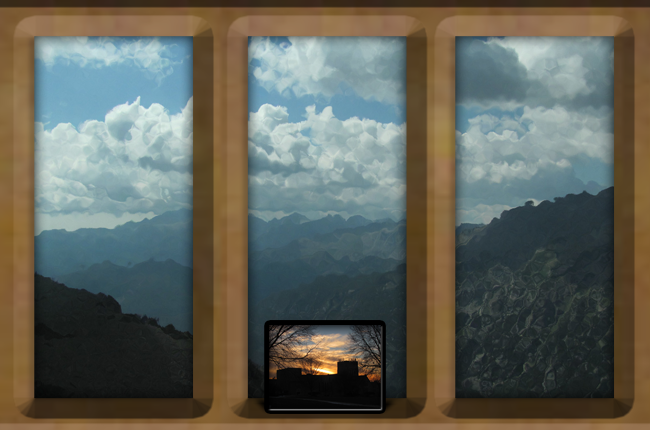
Picture of a picture in a frame on a window frame.

All it took was a couple photos, Photoshop, and about 10 minutes… once I knew what I was doing

So, the two photos are completely separate, and started from these:

Pretty colorado mountains that get turned into a window view

This is the original view the “window” looks out on

Pretty building sillhuette at sunset

This is the one in the “frame”.

I next distorted the “view” picture using glass effects. I used the “frosted” glass option. For this one, I went with a small amount of distortion and a large amount of “smoothness”.

I then used vectors to create my frame shape, used a wood pattern I created a while ago to make the window look wooden, and bevelled the heck out of that layer. (Play around with it until you get something you like.) I used the “hard chisel” Inwards.

To create the frame shape, I used the rectangle tool. Next, I took three rectangles “out” of the shape, by using the “subtract” option on the rectangle tool. That’s what gives it the multi-paned look.

Have fun with the wood pattern… I don’t remember how I did that one.

Next I copied the “framed picture” into the image I was working with, on a layer above the frame. I resized it, and moved it to where I wanted. Next, I gave it a fairly thick black stroke. Make sure it’s thick- you’re going to bevel this one, too.

So as I just said, go to bevel. Use the “stroke” bevel. Make sure the depth is less than the thickness of your stroke.

Next, create a new layer the size of your “framed picture”. (This will be your shadow.) Fill it with a dark color, and move it behind your frame. Skew it until it gets to be about the shape you want. Turn the setting to “Multiply”. Then give it a “box blur.” (Again, play around with the settings until you like what it shows.)

And that’s it!

I’ve done a few others of these windows, and just reuse the window frame. (And really, that’s the hardest part. So once you create one, you’re set for a while!)

And there you have it! Other possibilities include “taping” pictures to the window or window frame. Or create more “framed pictures” to go on the “window sill.”

Then you can either use it as a desktop background on your computer (and look “outside” when you’re not working), or you can maybe stick it on a wall to give yourself an extra cool window.

Have fun!

What to Do when you’re Really Excited

Note: If this is your first time to TotalFluff, please visit this brief explanation. Thanks!

Hello, Fluffsters!

Something that people do is they get excited. And when they get excited they do things to try to express the excitement. Here is a list of things to do that I’ve come up with. (I may or may not use any/all of them…)

1) Bounce. This one’s very easy, and has many ranges. For simple bouncing, start with a flat-footed position. Transfer your weight to your toes, and raise your heels. (Basically go up on tip-toe.) Then, return to your flatfooted resting position.

1b) Advanced bouncing. For more advanced forms of bouncing, once you are on your toes, add a small jump in, land back on your toes, and only then return to your flatfooted position.

1c) Trickiest Bouncing.For the most advanced form of bouncing, which I have not yet mastered, increase the jump size, aim your feet towards a wall or a ceiling, and hit said wall or ceiling. You are now bouncing off walls.

Disclaimer: If you try this type of bouncing, be sure to land back on your feet. We at TotalFluff are not held liable for any damage that may come from attempting anything on this site.

2) Hug someone. I’d suggest getting their permission first. Or at least make sure you know the person before you give them a hug. Hugging a random stranger sometimes gets you weird looks…

…Is that the voice of experience speaking?

I’m… not going to answer that one.

3) Do a cartwheel, or other gymnastics. I actually haven’t done this one. But I wish I could- it looks like a great way to express excitement!

4) Talk to a friend. As long as they’ll even somewhat understand why you’re excited. (It’s annoying to talk to people who give you a confused, “okay, dear, whatever you say” look when you’re super excited(!) about something.) The shrieks of excitement are always fantastic.

Yup. That’s about what I can come up with. What about you? Do you do anything when you’re feeling really excited?

DIY Teastained Decorations

Note: If this is your first time to TotalFluff, please visit this brief explanation. Thanks!

Hiya, Fluffsters!

I am very happy to be providing you with a tutorial today!

In case you hadn’t noticed, I kinda have a bit of a fantasy theme going with my room. And one of the major advantages of fantasy is that you can never have enough decorations!

You either have too few, or too many, but never “enough”?

Something like that.

But this means that when I have free time, I can work on more decorations for my room, and it works!

I’m not completely done with the current project yet. For starters, I haven’t quite figured out how I’m going to display the project yet. But I still like the way they’re turning out!

Here’s a picture of segments of part of them, to show you part of what the tutorial will work towards.
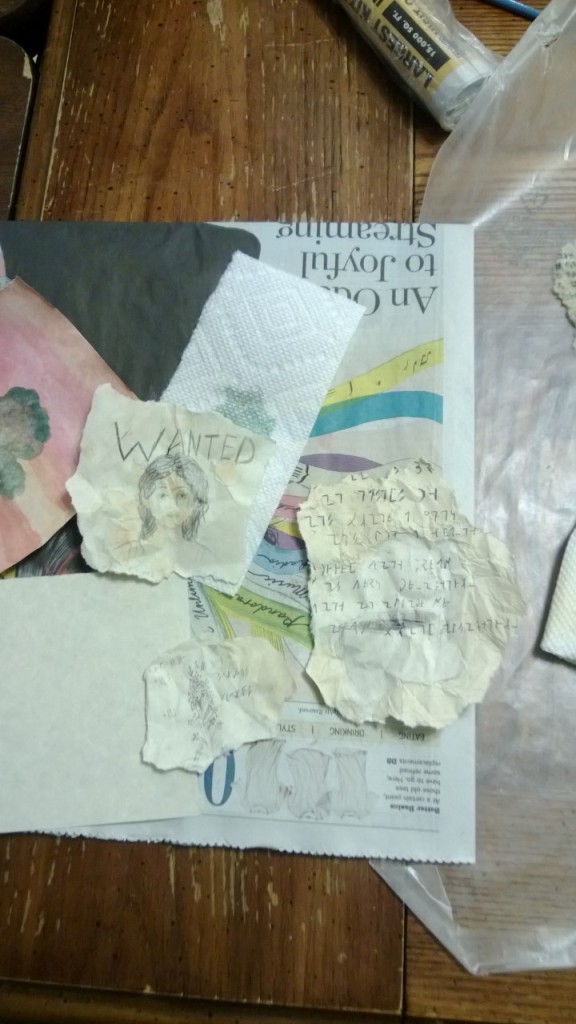
Three tea-stained doodles.

Three pieces from the new “Tea” collection… Or something.

So, here we go!

Teastained Dorm/Room Decoration tutorial

Supplies

To do this, you’ll need:

  • paper (Parchment paper looks pretty nifty.)
  • something to draw with
  • A cup for hot water
  • A tea bag. (I used Earl Grey.)
  • Hot water. (approximately 1-4 ounces.)

3 easy Steps

1) Cut or rip paper to appropriate size. I quartered my parchment paper. This gives you more to play with. Also, I don’t really like doing full-size paper thingies. So it works out for me. But make it whatever size you want. If you’re going to make a masterpiece you don’t want to lose any/much of, leave some space around the sides.

You’re going to rip the paper there towards the end of the process, so don’t worry about cutting paper perfectly or anything silly like that. You could rip it to look cool first, but I find it harder to draw on. So for laziness’s sake, I like drawing, and then ripping. (It looks more authentic, too.)

1b) Start your tea steeping. You should probably have done this before you start tearing your paper. You want really strong tea, to get a stronger color.

2) Draw your picture. Or write your poem, or set of proverbs. If you’re lacking inspiration, Fluffy did just share a set of… odd… proverbs and sayings. You can choose what type of medium to draw with. Pencil stays about the same. Ink runs, for a beautifully smudgy effect. (See picture below.)

3) Distress your paper. There are several ways to do this, all of which are variations on “Crumple, uncrumple, wet with oversteeped tea, and tear.” The steps can be rearranged, to different effects.

If you tear before you get the paper wet, the edges look a little rougher. If you get it wet and then start to tear, you have a lot more control over the torn edges.

Crumpling and then submerging the ball in the cup of tea also gives a cool effect.
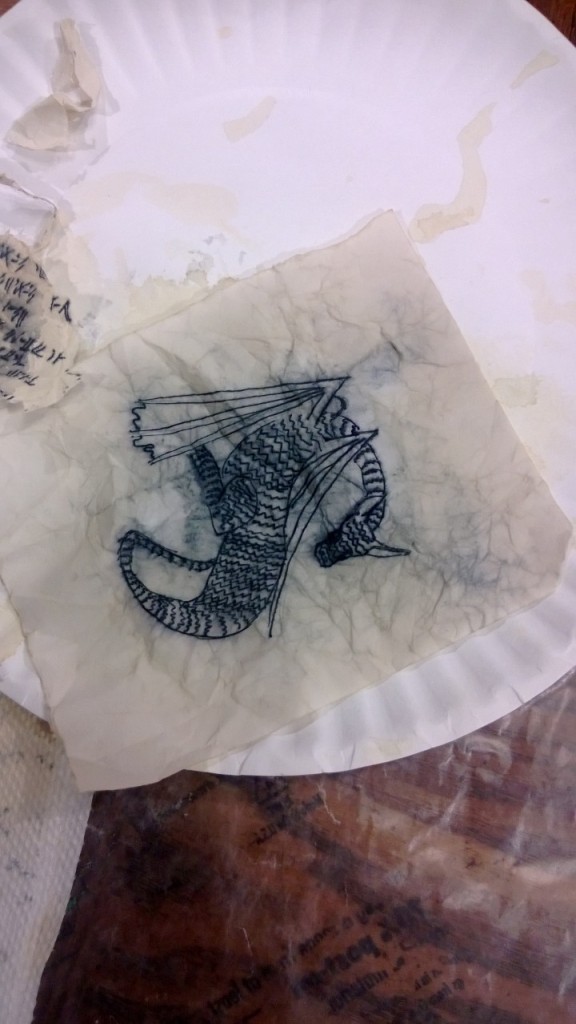
A smudgy ink tea-stained dragon.

Ink also gives a fun effect! This is “normal” (non-parchment) paper.

This was one that I submerged as a paper-ball. It’s also one that I used ink on. I love how the ink ran into the creases! I haven’t torn this one yet, but I’ll be doing that after it dries. (I want the rougher edge look.)

Distressing your paper without submersion. This can be done in a variety of ways, for a variety of effects.

1) Painted on / sloshed / sponged.
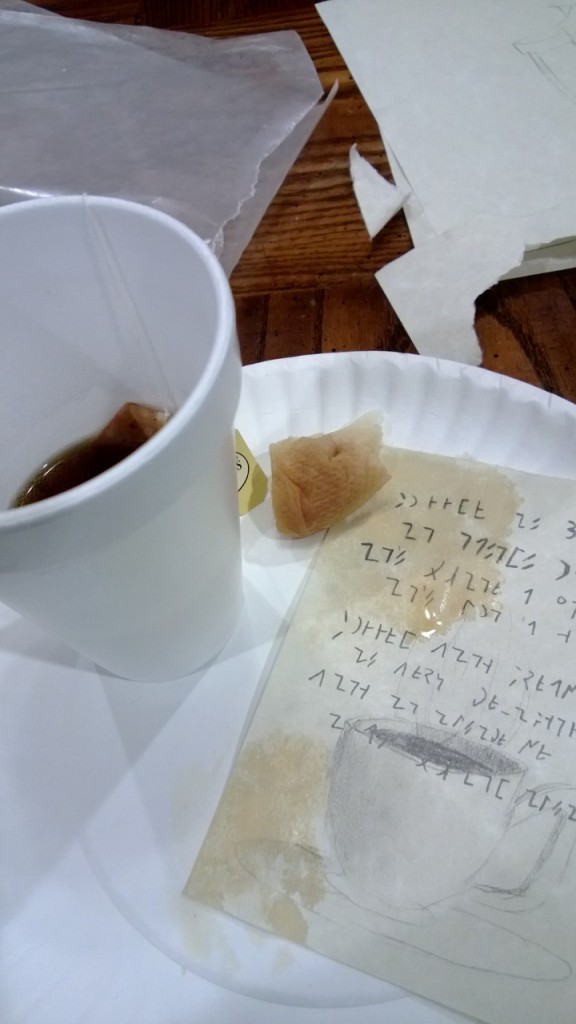
distressed paper with a sketched mug and poem.

Sloshed / sponged / painted tea stain effect.

I used a paper towel to sponge the color on at this point. I then used another paper towel to blot it. Clearly, this is one where I crumpled and tore it after putting tea on it.

You can see the final version of this one peaking its head out in the first picture I shared. (I clearly later added more tea, and ripping effects.)

Spotting / spatter / drip

This is also easy. I took the teabag out of the cup, and bounced it on top of the picture. My story for the picture I did this of is that someone has fond memories of a convict, and therefore has the “wanted” poster snippet nearby. Whoever was keeping the poster will be quite peeved when s/he discovers somebody splashed some tea on it.
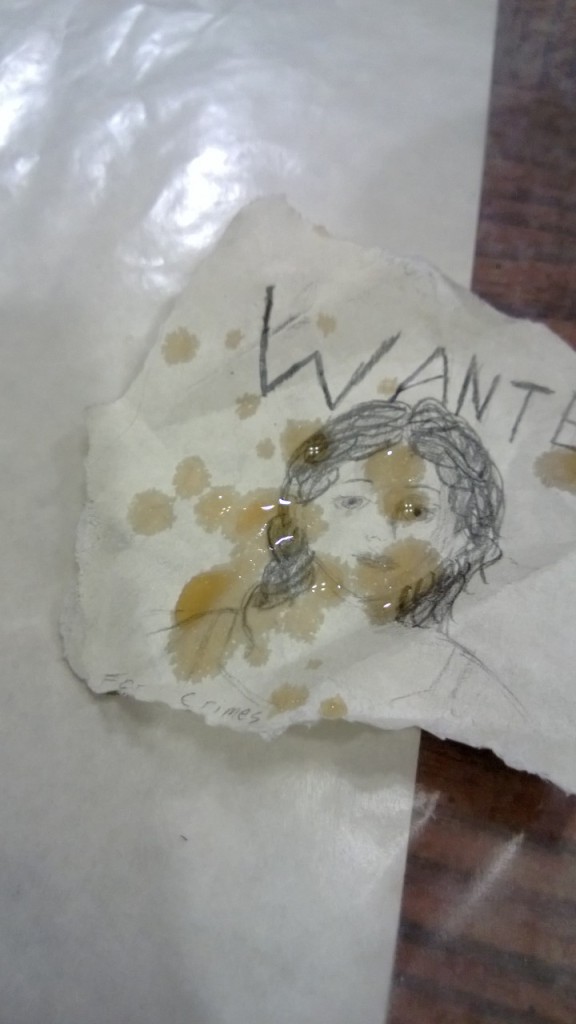
A splashed "wanted poster" of parchment paper.

Inspired by Once Upon a Time’s Snow. I know, it’s not obvious. But I tried…

As you can see, the pencil stays clear throughout the entire process. Well, as much as pencil ever does. The spotted coloration here is much more subtle than the complete submersion. Or painted effects. But it’s still fun.

And then, because I’m pleased with how it turned out, here’s a picture of another submerged Ink one.
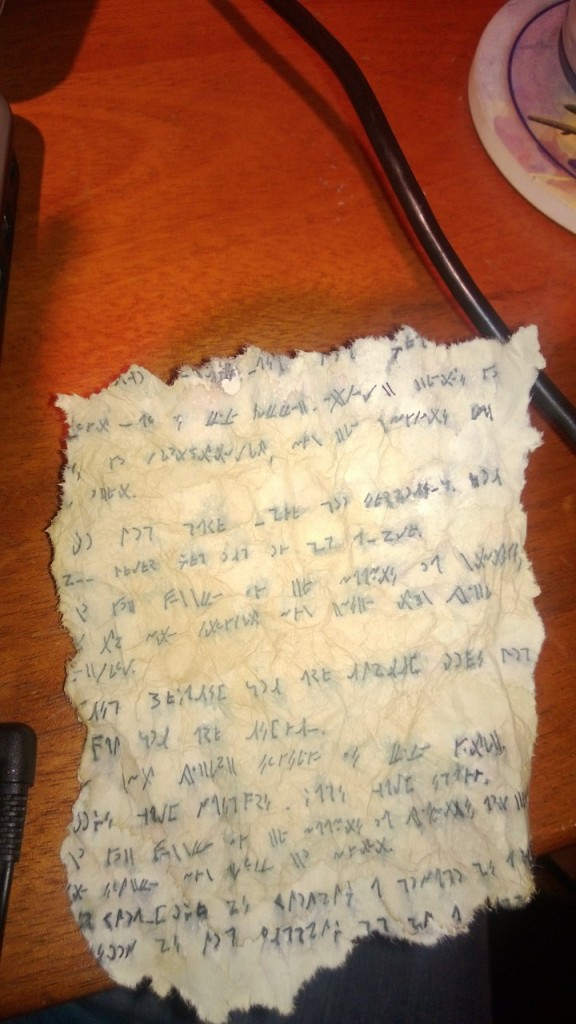
An old-looking piece of parchment with a weird alphabet on it.

I wonder what ancient civilization’s poetry I found? 🙂

After it dried (somewhat) the first time, I put more tea on the center. That adds a vari-colored effect. But doesn’t that look positively ancient? Or at least, older than 36 hours old?

Well, have fun! I found this a great way to entertain myself.

I think my next set of tea-stained “poetry” will be monologues from “William Shakespeare’s Star Wars.” The poetry within deserves a display like that! And I truly mean that in the best way possible!

So, Fluffsters, do you have any recommendations for how I display this?
DIY easy paper fan tutorial

Note: If this is your first time to TotalFluff, please visit this brief explanation. Thanks!

Hello, Fluffsters! It’s still really hot where I am. So I’m continuing tips on staying cool. Today I’m talking about how to do an…

Easy DIY paper fan.

It’s really easy. The bare necessities are some sort rectangular papery substance that holds a fold. The thicker the paper, the more air flow you can get, but almost any type of paper will work. (I would not use rice paper or origami paper, but I suppose you can.)

The optional first step is to color a picture on your paper. This is particularly fun for kids, and makes a great time-sink for them.

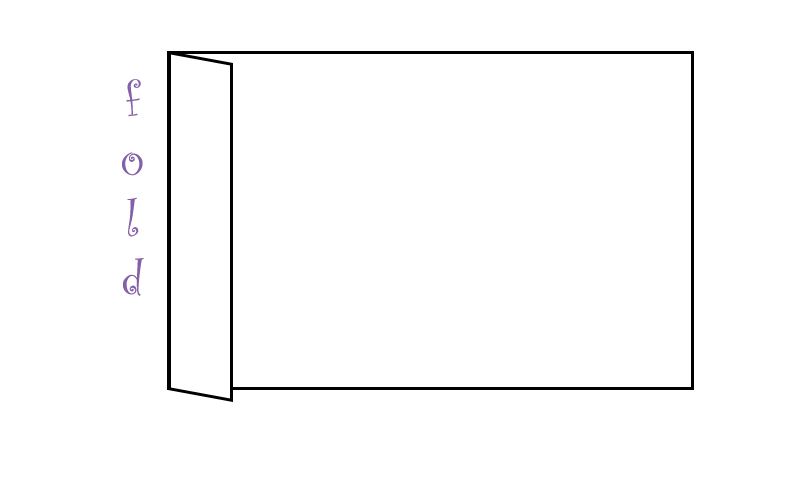
A blank page of paper illustrated

Your blank page. Hold it like this.

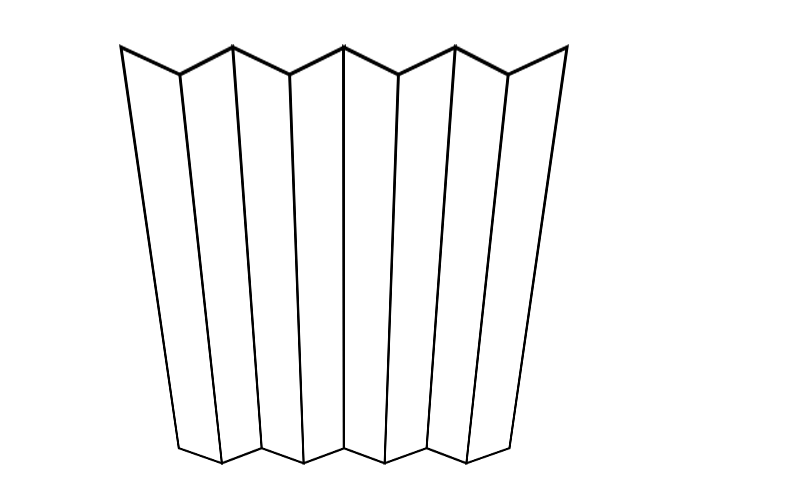
To start the fold, take one of the sides of your paper, and fold it in (on top of the rest of the paper) by about an inch or so.

Paper fan step 1: illustration of the first fold.

The first fold.

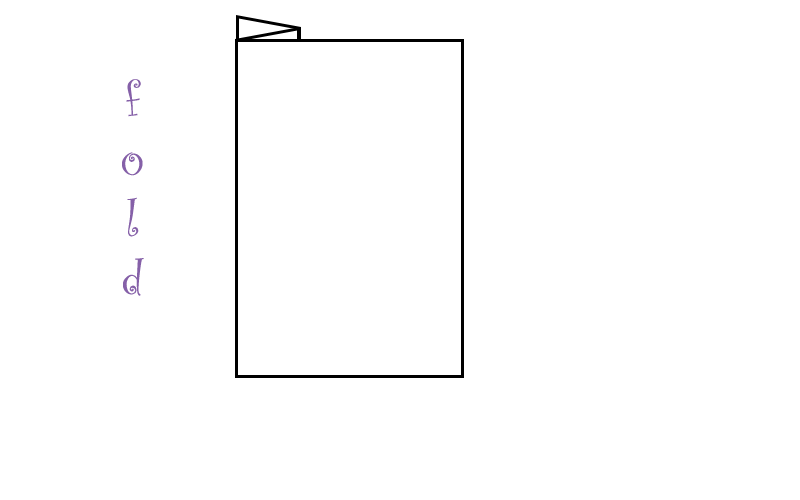
Next, take both parts of your fold, and fold that part back the same amount.


Second fold of making a fan.

Second Fold

After that, keep alternating. Fold in, then out, then in, then out…

You’ll eventually end up with something like these:

side view of folded paper

side view of folded paper

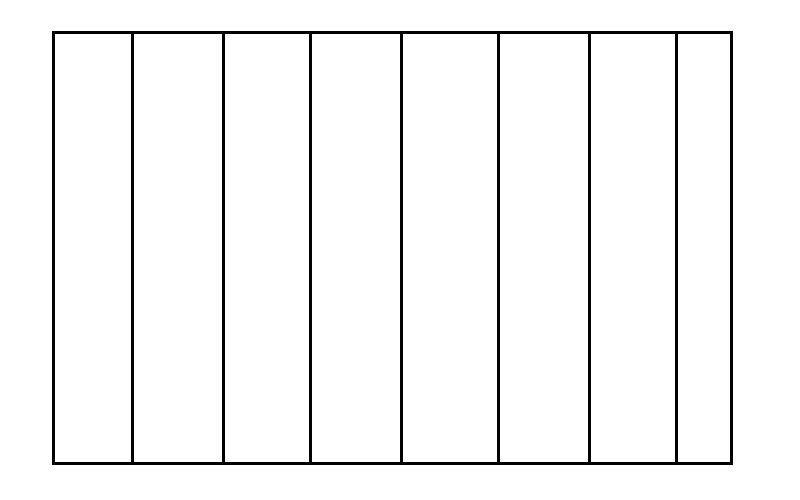
Final fold lines on the fan

Each line (except the end ones) are fold lines.

Then you’ll want to gather the bottom of your fan closer together, for easier hold.

View of the fan from the front.

Front view of the (almost) finished fan.

After that, just start using your fan as you would any other! Stiffer paper fans can provide lots of air flow and are very useful. I hope you can stay cool!

Ways to Cool Down

Note: If this is your first time to TotalFluff, please visit this brief explanation. Thanks!

Hello, Fluffsters!

As I mentioned yesterday, where I am currently living is quite warm and muggy this time of year. As I really dislike over heating, I’ve found a few ways of cooling off.

1) Cold water on your wrists, the back of your neck, and inside of your arms. Then stand in front of a fan, or anywhere with moving air. It doesn’t keep you cool for very long, but it really helps to cool you off at least temporarily.

2) Drink LOTS of cold liquids. Water, of course, is the healthiest. My biggest problem is that after about a glass of water, the taste really starts to bug me. My solution, recently, has been to drop in about a sliced quarter of lemon. It adds enough flavor, and is refreshing, to make the water drinkable. Be sure to have as much ice as possible, too.

Needless to say, hot water doesn’t work very well for this.

It’s also best to use thinner liquids, at least from my experience. Unless you can get a smoothie. Then always get the smoothy.

3) Find a nice cool wall to lean against. I am really good at this one. A couple of years ago, my bed was right up against a cinderblock wall. It was lovely. The wall was always cold, and so if I got hot in the middle of the night I could just throw off the blankets and rest my back against the wall. That really helps cool you off.

4) Cold showers. They’re wonderful for cooling you down. You might start with warmer water, and then work your way down in temperature. Regardless, there are few things quite so refreshing as a cold shower!

But how about you, Fluffsters? Do you have any favorite ways of keeping cool?